はじめに
この記事では Datasmith ファイルを Twinmotion からエクスポートして UE5 にインポートする方法をザックリと解説します。
この記事で使用したエディタやプラグインのバージョンは以下の通りです。
- Twinmotion 2023.1.1
- UE 5.11
- Datasmith Twinmotion Content 2023.1
- Datasmith Importer 1.0
手順
プラグインの有効化
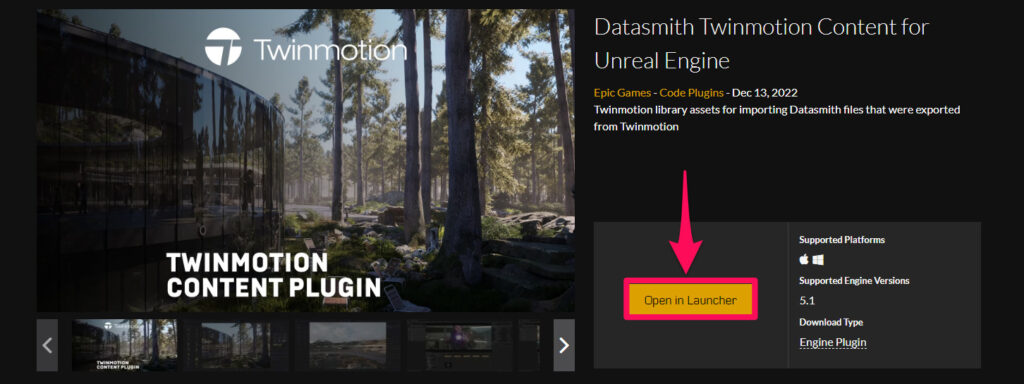
手順1
早速手順を解説します。
まずはマーケットプレイスの「Datasmith Twinmotion Content for Unreal Engine」のページにアクセスして「Open in Launcher」を押します。
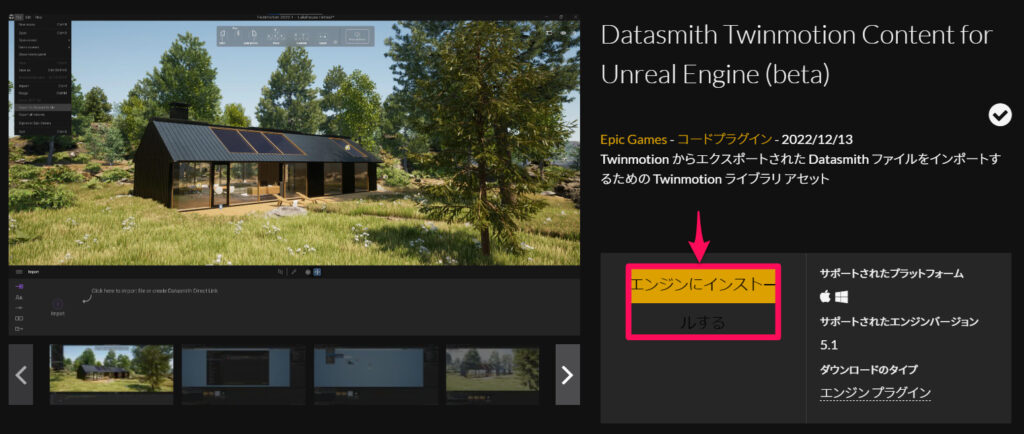
手順2
Epic Games Launcher が開いたら「エンジンにインストールする」を押します。
手順3
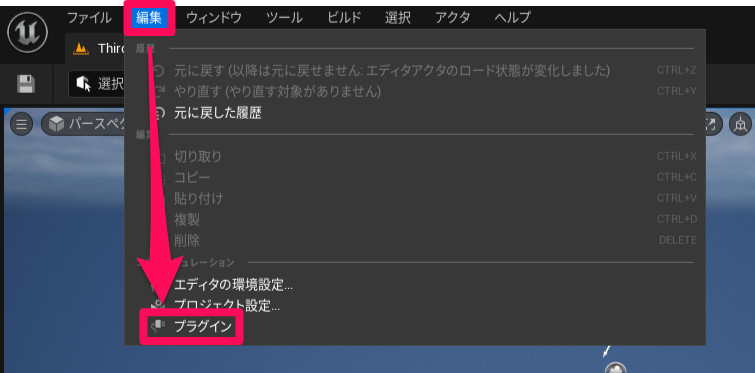
UE へのインストールが完了したら、Datasmith ファイルをインポートしたい UE プロジェクトを開きます。
プロジェクトが開いたら左上の「編集 > プラグイン」を選択して「プラグイン」ウィンドウを開きます。
手順4
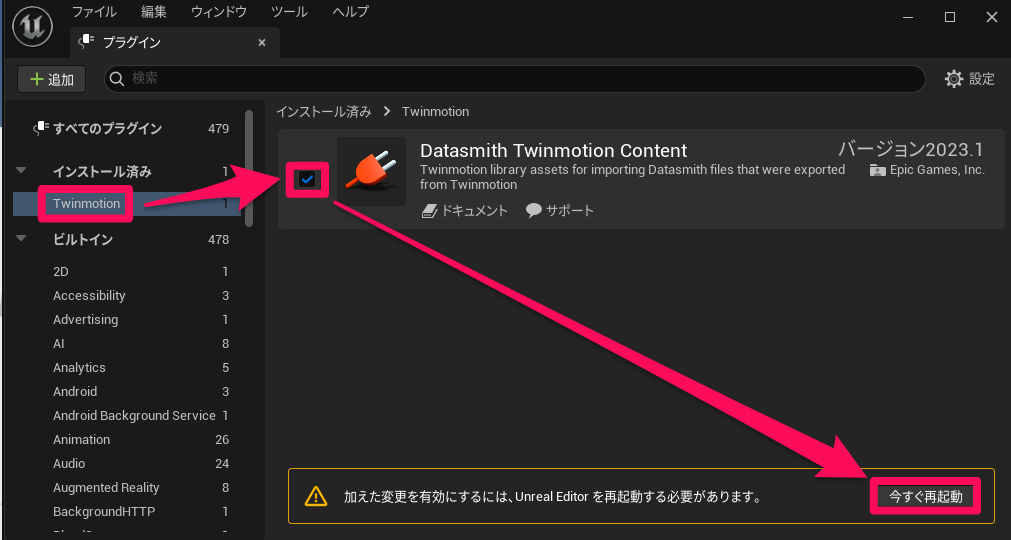
「プラグイン」ウィンドウで「インストール済み > Twinmotion > Datasmith Twinmotion Content」にチェックを入れて右下の「今すぐ再起動」を押します。
手順5
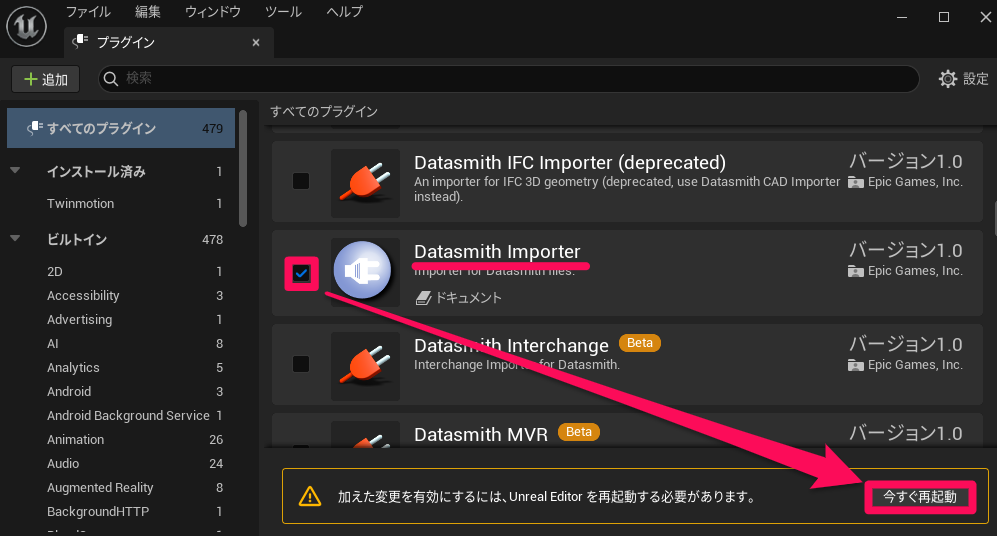
エディタを再起動したら、再び「プラグイン」ウィンドウを開いて「Datasmith Importer」にチェックを入れて右下の「今すぐ再起動」を押します。
Datasmith ファイルのエクスポートとインポート
手順6
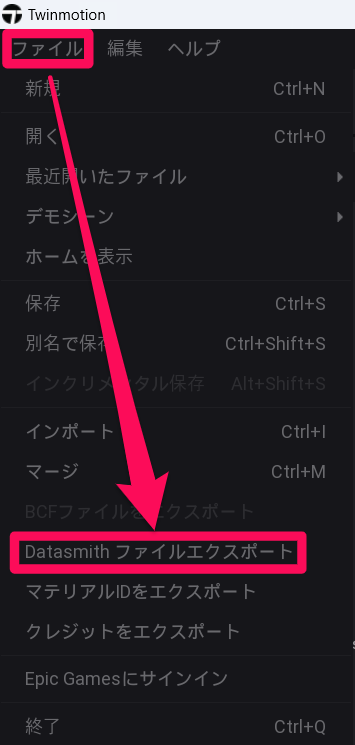
Twinmotion でプロジェクトを開いて「ファイル > Datasmith ファイルエクスポート」を選択します。
手順7
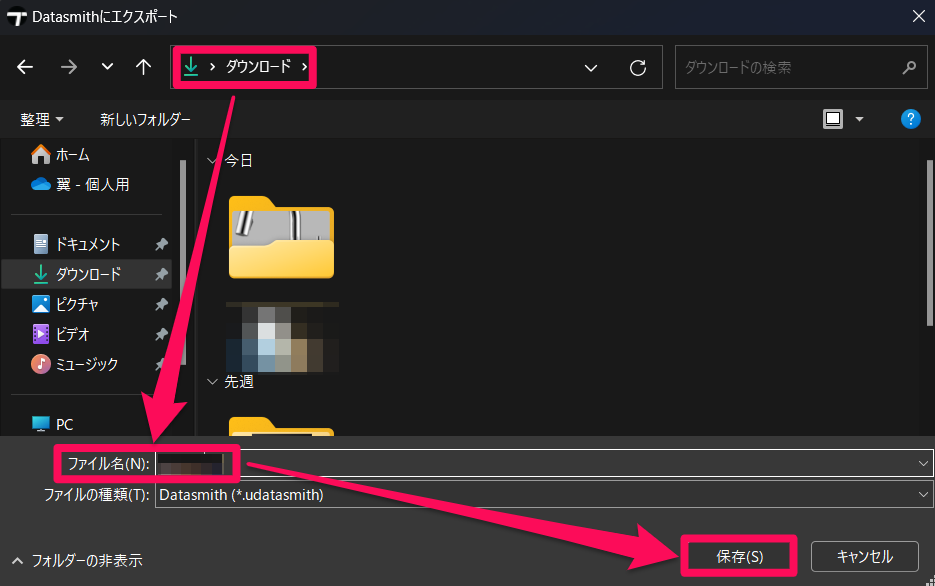
ダイアログが開くので保存先を選択してファイル名を設定し、右下の「保存(S)」を押して Datasmith ファイルをエクスポートします。
手順8
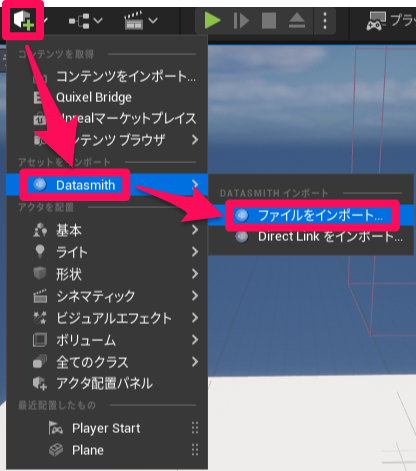
Unreal Editor を開いてレベルエディタの左上のアクタ追加ボタンから「Datasmith > ファイルをインポート…」を選択します。
手順9
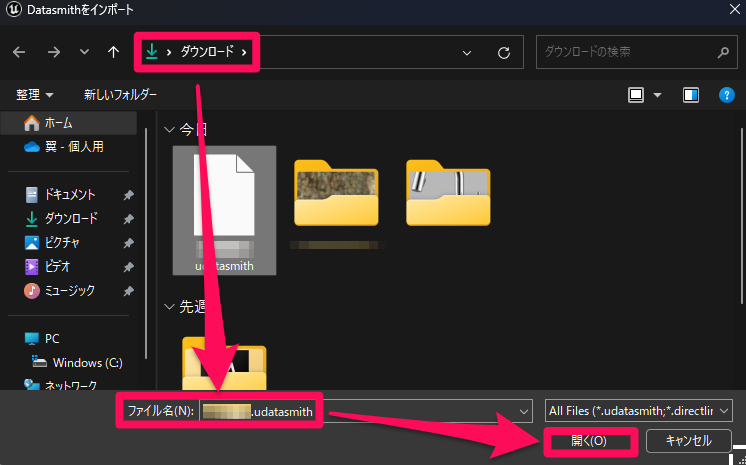
「手順7」でエクスポートした Datasmith ファイルを選択して右下の「開く(O)」を押します。
(Datasmith ファイルの拡張子は「.udatasmith」です)
手順10
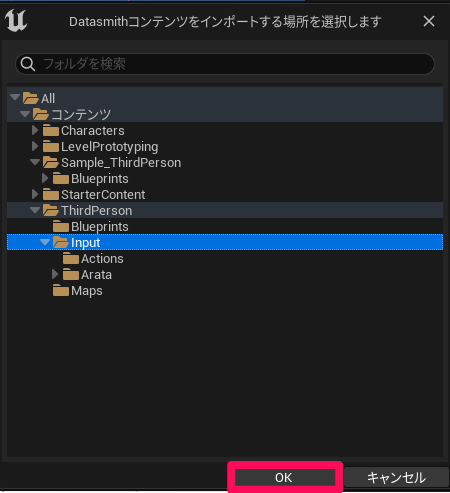
Datasmith コンテンツをインポートするディレクトリを選択して右下の「OK」を押します。
手順11
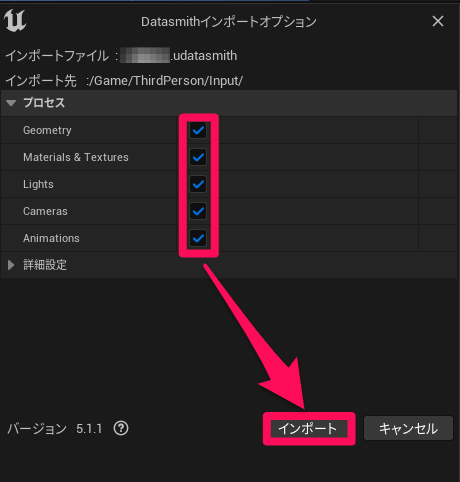
「Datasmithインポートオプション」の全ての項目にチェックが入っていることを確認して右下の「インポート」を押します。
これで Twinmotion からエクスポートした Datasmith ファイルを無事に UE5 にインポートできたかと思います。