はじめに
この記事では Unity で Image の角を丸くする方法を超絶ザックリと解説します。
手順
パッケージのインストール
手順1
早速手順を解説します。
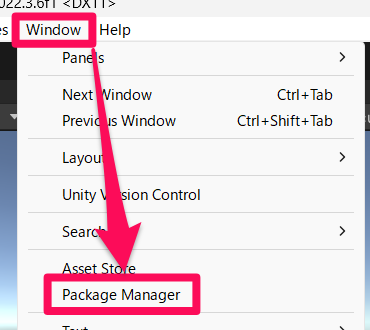
まずは左上から「Window > Package Manager」を選択して Package Manager を開きます。
手順2
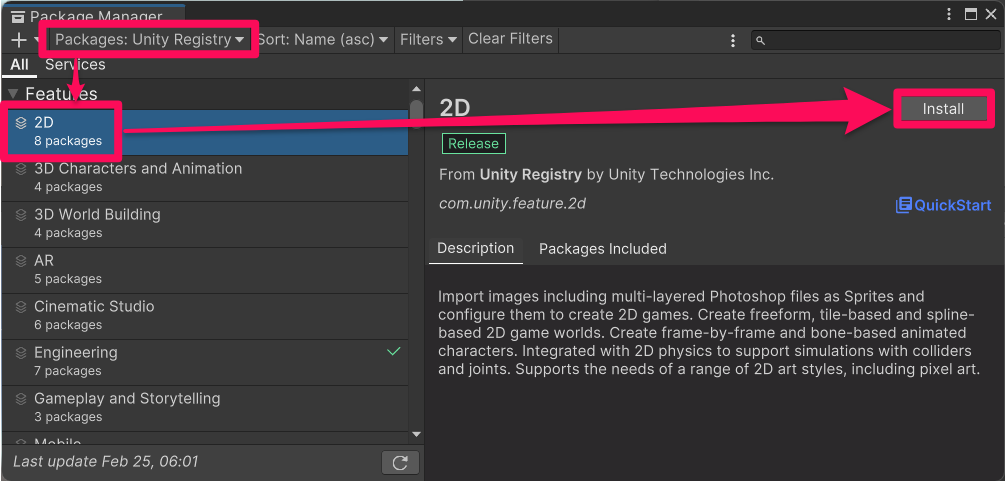
Packages が「Unity Registry」になっていることを確認して「2D」を選択し、右の「Install」を押してインストールします。
スプライトの作成
手順3
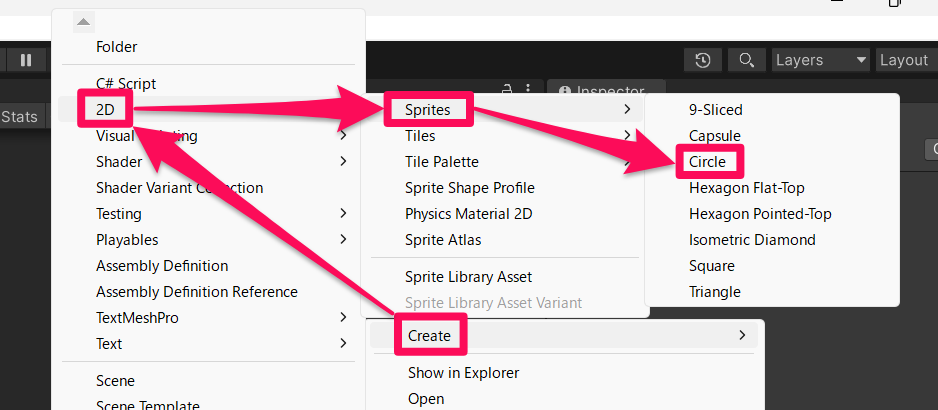
Assets フォルダの中で右クリックして「Create > 2D > Sprites > Circle」を選択します。
手順4
作成された円形のスプライトを選択して「Inspector > Sprite Editor」を押します。

手順5
Sprite Editor というタブが開くので Border の各値を Position の各値の半分の値に設定します。
下の画像では256の半分なので128に設定します。
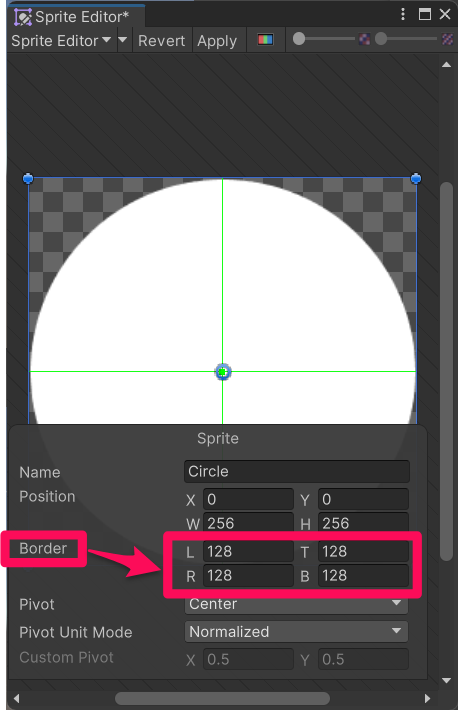
Image の設置と設定
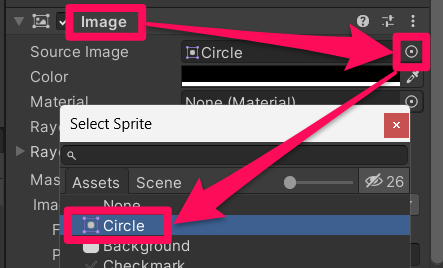
手順6
UI 用のゲームオブジェクトにアタッチされている Image コンポーネントの Source Image に「手順3」で作成したスプライトをアサインします。
手順7
Image コンポーネントの中の Pixels Per Unit Multiplier にいい感じの値を設定します。
Pixels Per Unit Multiplier については我らの ChatGPT の説明を引用します。
Unityの「Pixels Per Unit(PPU)」とは、スプライト画像の「1ユニットあたり何ピクセルか」を表す設定です。具体的には、たとえば PPU を 100 に設定すると、スプライトの 100 ピクセルが Unity 上の 1 ユニット(多くの場合 1 メートル相当)になります
ChatGPT
これで Image の角が丸みを帯びているはずです。