はじめに
この記事では Google Apps Script を使って Slack のボットをメンションで反応させる方法をザックリと解説します。
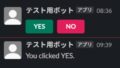
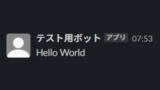
この記事の手順を踏めば最終的にはこの画像のようにボットをメンションすると自分をメンションして反応してくれるようになるはずです。
手順
GAS のプロジェクトの作成と設定
手順1
早速手順を解説します。
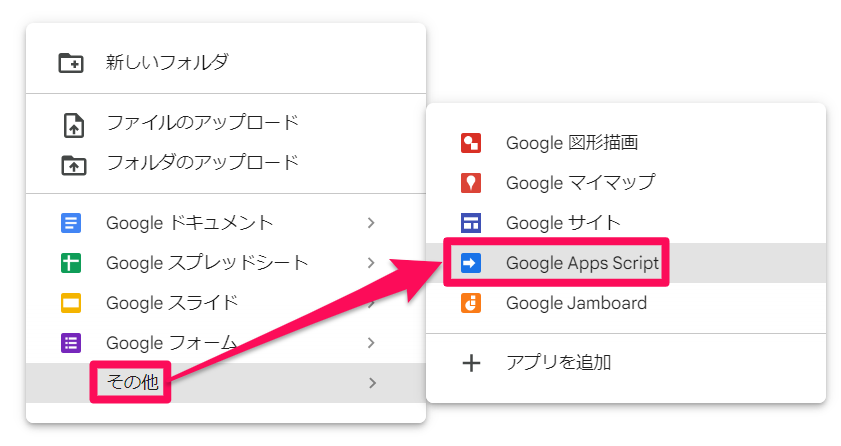
まずは GAS のプロジェクトの作成と初期設定を行います。
Google Drive の中の空いているスペースで右クリックして「その他 > Google Apps Script」を押し、GAS のプロジェクトを作成します。
手順2
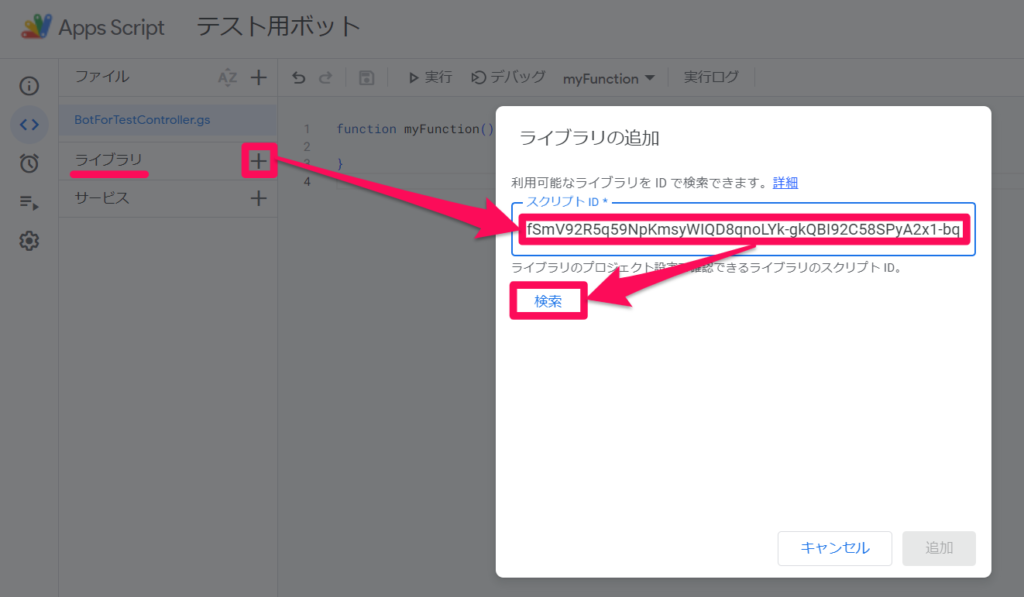
作成したプロジェクト開いて「ライブラリ」の右の「+」を押し、「ライブラリの追加」の「スクリプトID」に「1on93YOYfSmV92R5q59NpKmsyWIQD8qnoLYk-gkQBI92C58SPyA2x1-bq」と入力して「検索」を押します。
手順3
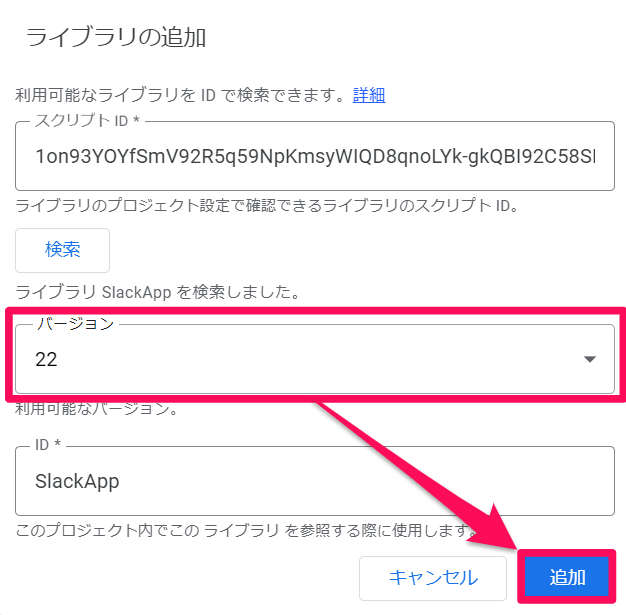
「バージョン」を最も大きい数字に設定して右下の「追加」を押します。
(この記事の執筆時では「22」が最大の数字だったので「22」にしています)
これで SlackApp というライブラリがプロジェクトに追加されました。
手順4
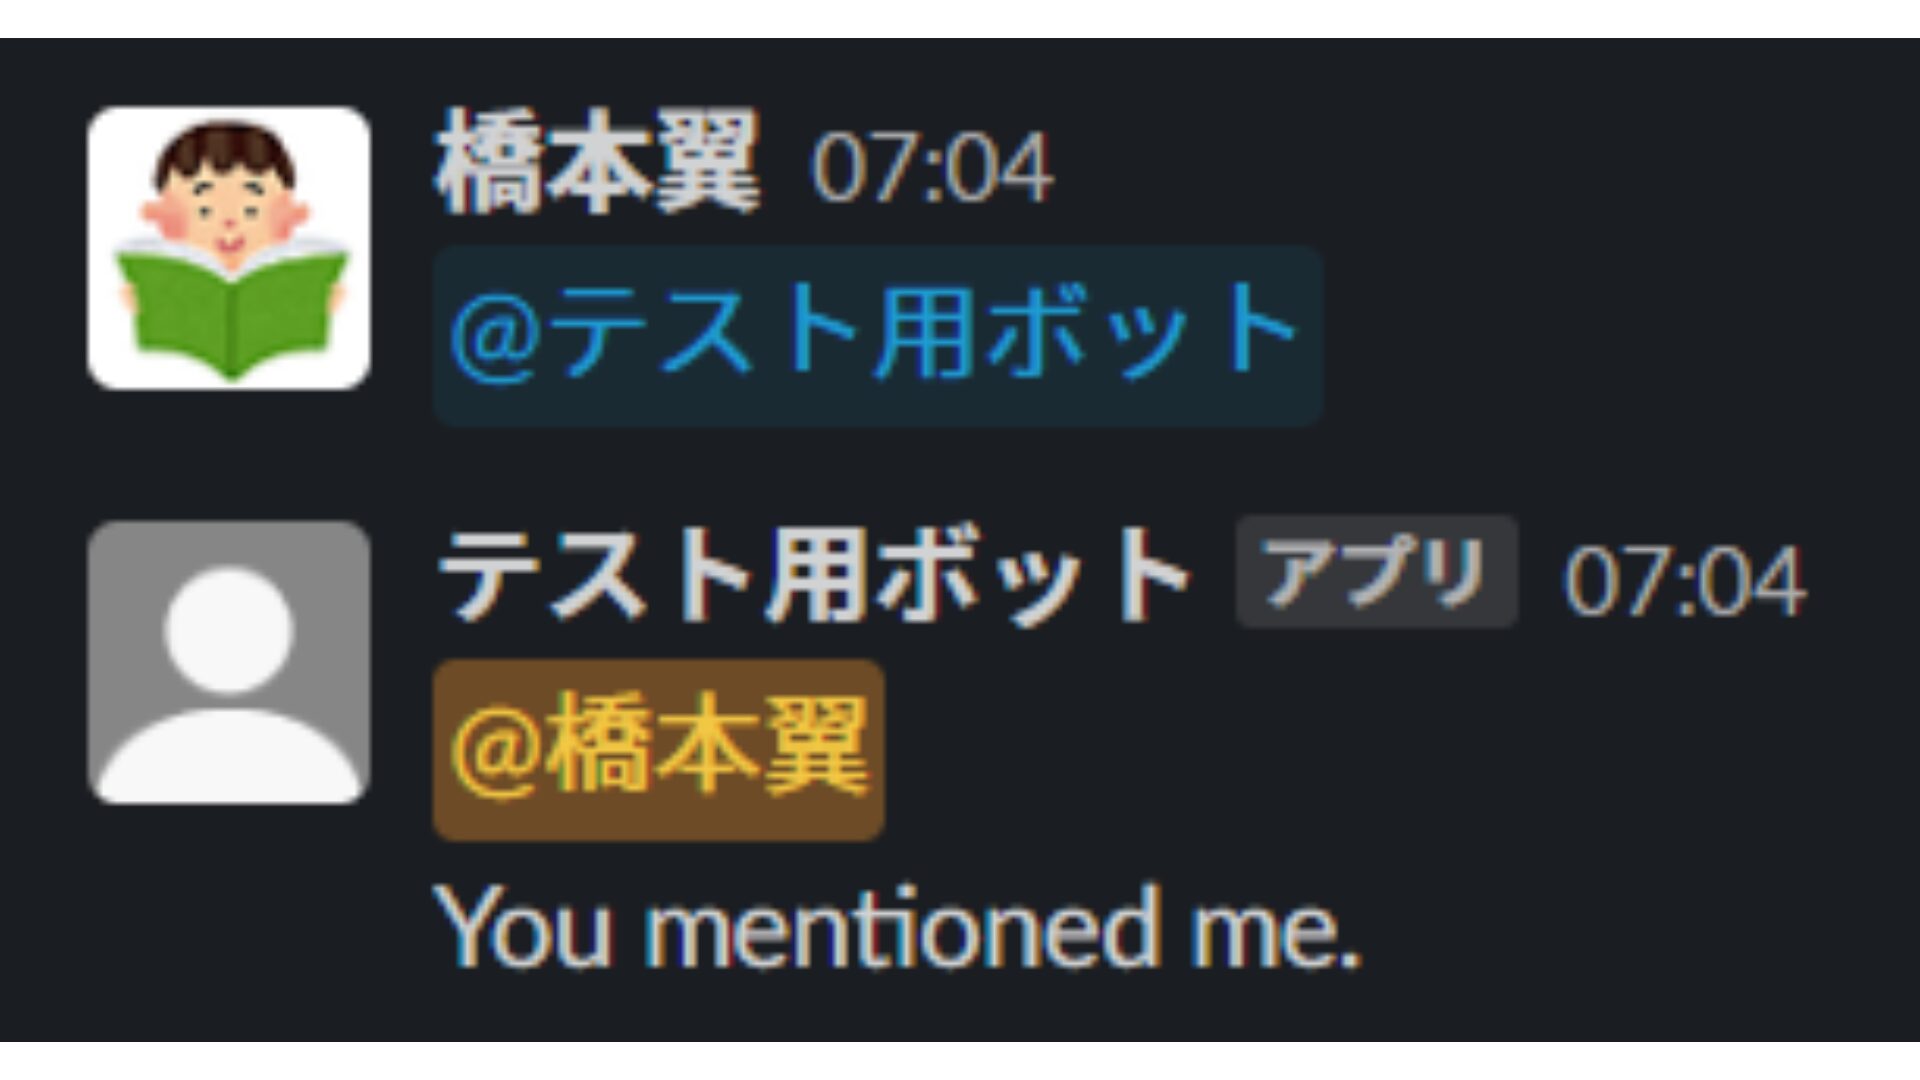
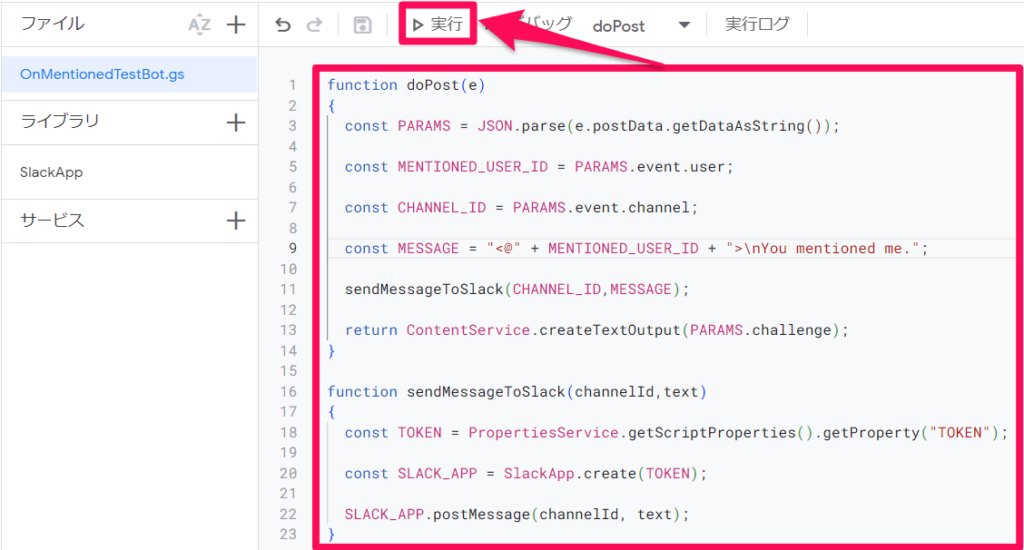
API ドキュメントを参考にしながら doPost() に適切なコードを記述します。
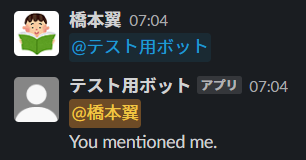
以下の画像のコードではボットをメンションしたユーザーを逆にボットがメンションして「You mentioned me.」というメッセージを送信するという処理になっています。
コードが書けたら上の「実行」を押します。
手順5
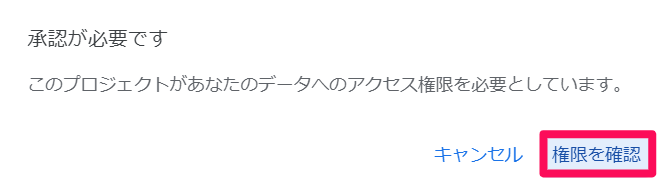
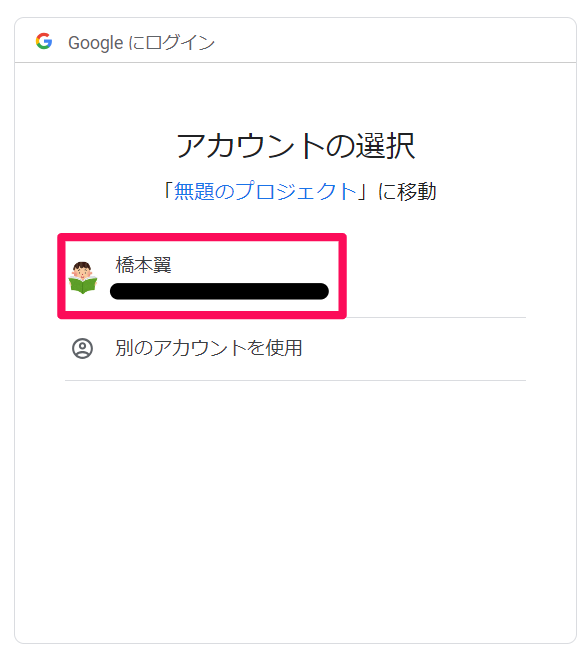
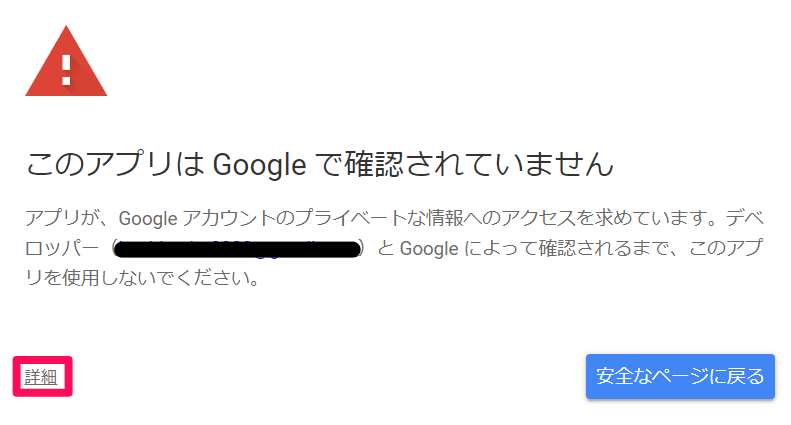
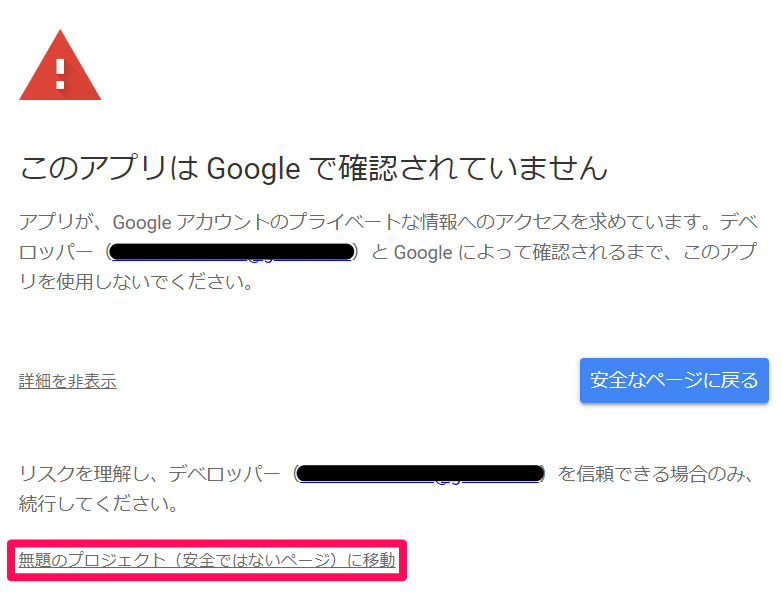
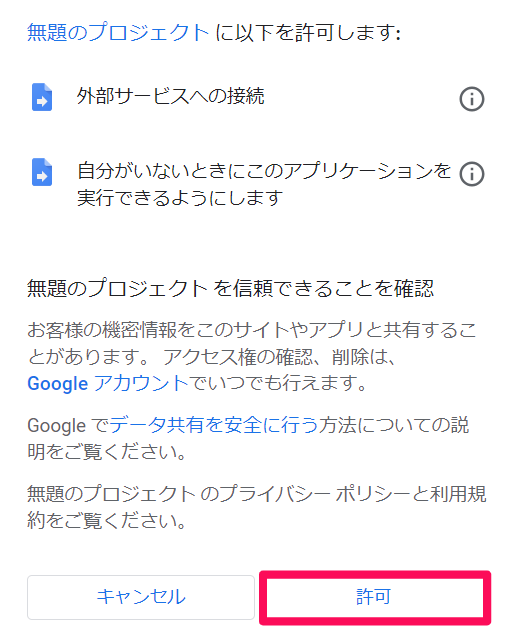
以下の画像を参考にして権限を承認します。
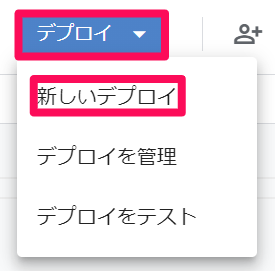
手順6
権限の承認が完了したら「デプロイ > 新しいデプロイ」を押します。
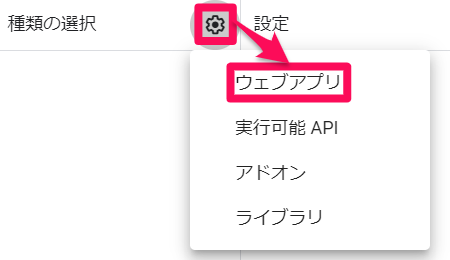
手順7
「種類の選択」の右の歯車マークから「ウェブアプリ」を押します。
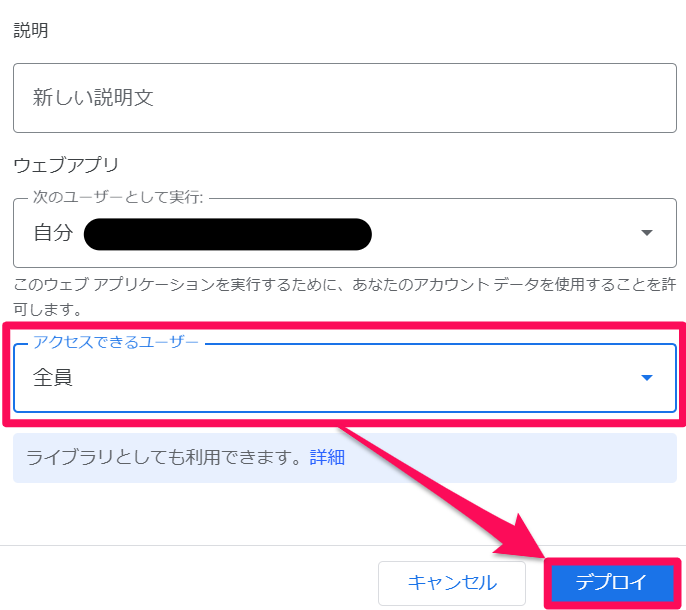
手順8
「アクセスできるユーザー」を「全員」に変更して右下の「デプロイ」を押し、デプロイします。
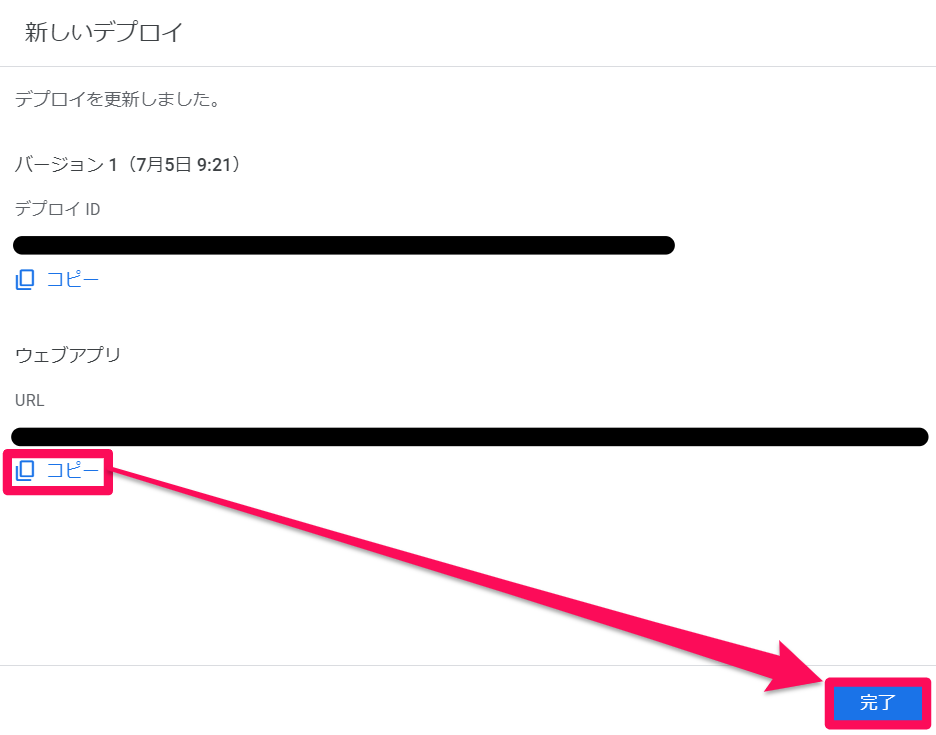
手順9
「新しいデプロイ > ウェブアプリ > URL」の「コピー」を押して URL をコピーし、右下の「完了」を押します。
ボットの設定
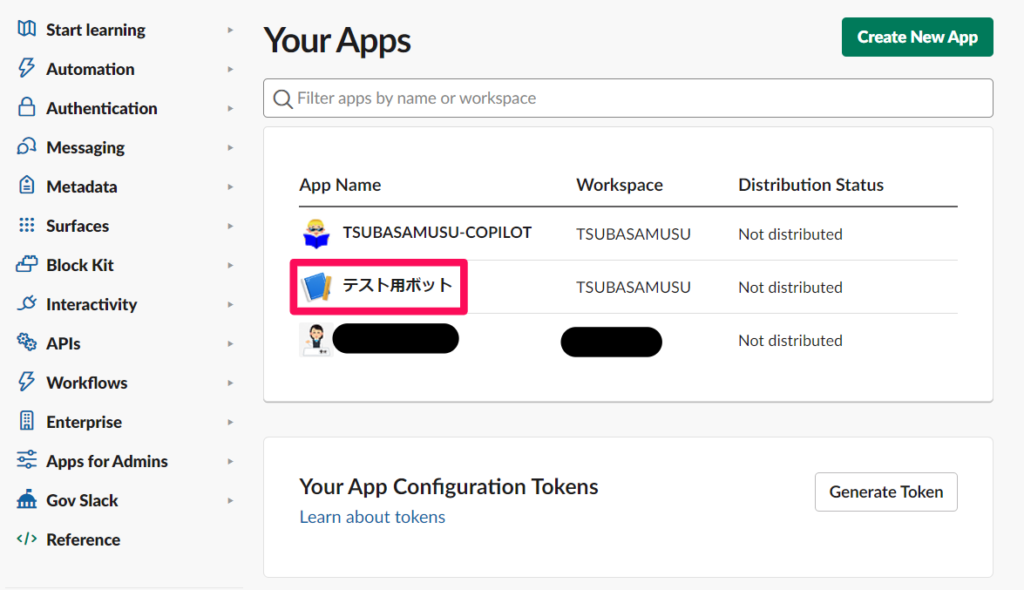
手順10
ここからはボットの設定を行います。
まずは Slack API のページに行って対象のボットを選択します。
※まだ Slack ボットを作成していない場合は以下の記事を参考にしてボットを作成すると良いかと思います。
手順11
「Features > OAuth & Permissions > Scopes > Bot Token Scopes」で「app_mentions:read」を追加します。
これでこのボットがメンションされているメッセージを読み取ることができるようになりました。

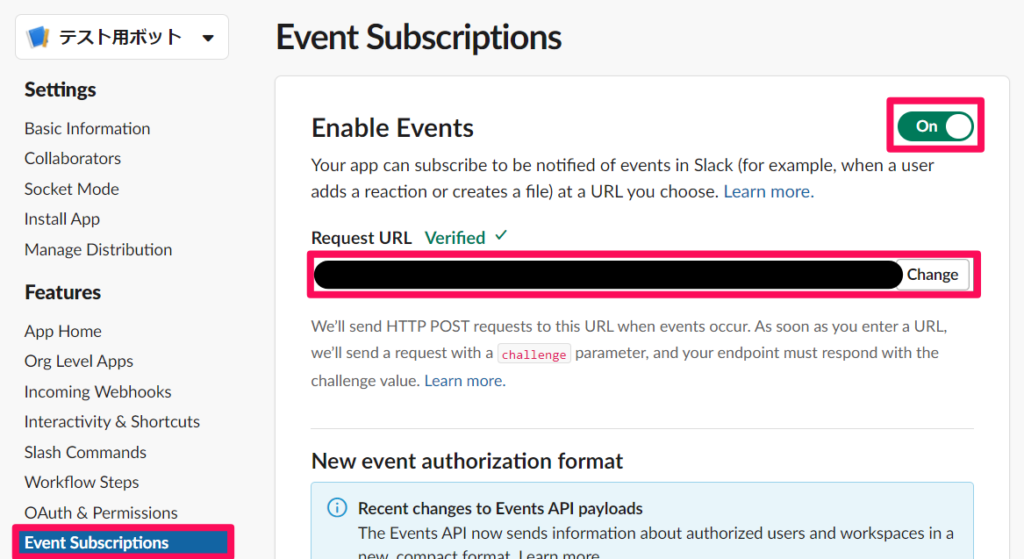
手順12
「Event Subscriptions」を開いて「Enable Events」を「On」に切り替え、「手順9」でコピーした URL を「Request URL」にペーストします。
手順13
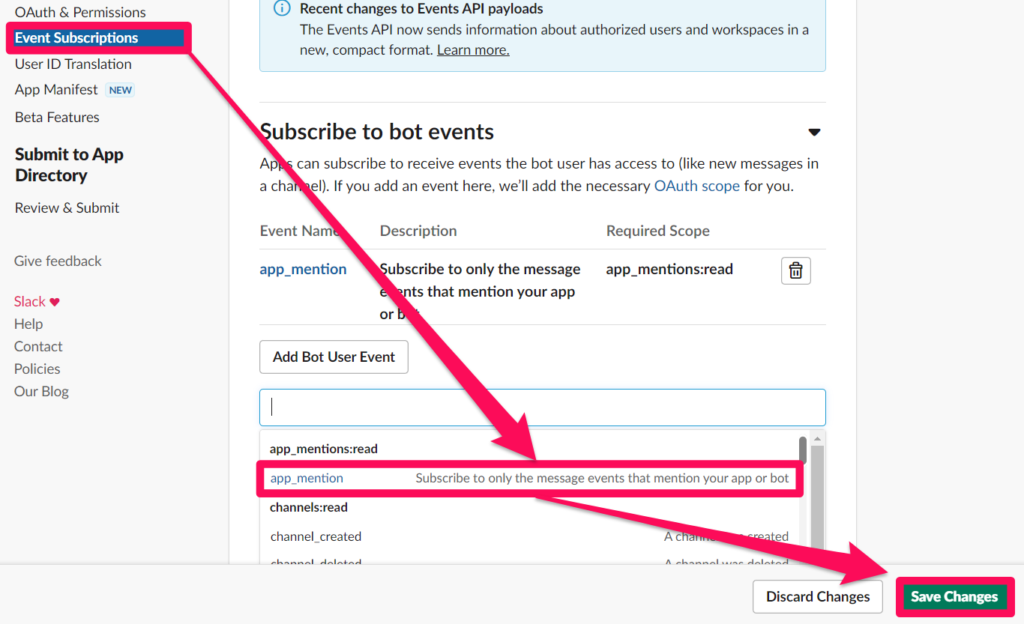
「Features > Event Subscriptions > Subscribe to bot events」で「app_mention」を追加して右下の「Save Changes」を押します。
これでボットがメンションされた時にイベントを発火させることができるようになりました。
手順14
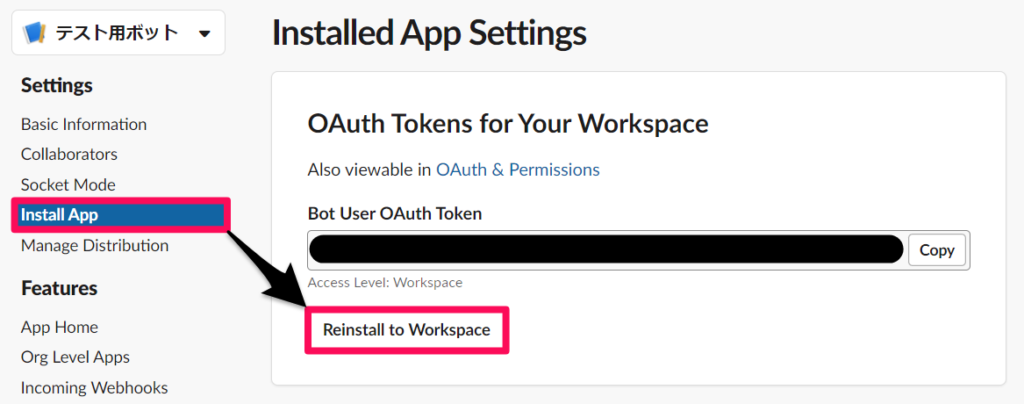
「Settings > Install App > OAuth Tokens for Your Workspace」で「Reinstall to Workspace」を押します。
手順15
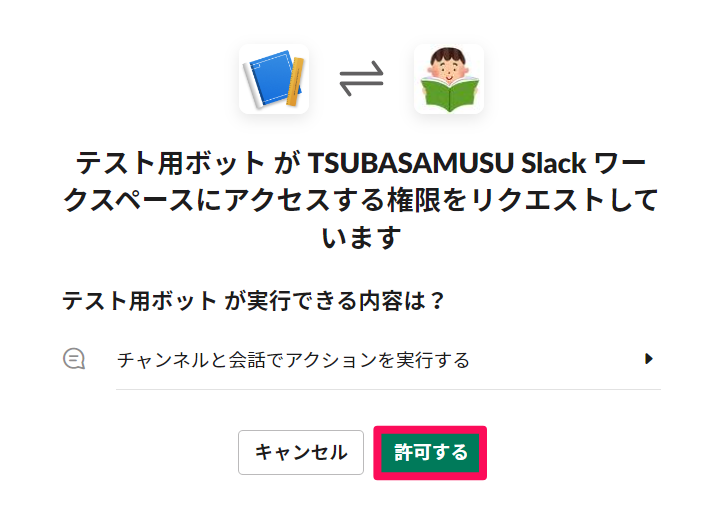
右下の「許可する」を押します。
ここまですれば Slack でボットをメンションすると GAS の処理が実行されてボットからメッセージが返って来るはずです!