
はじめに
UEFN でのマップ制作で Verse から UI のテキストを変更したいときがあるかと思います。
Unreal Engine の場合は Text を変数化して SetText() すれば OK なのですが、UEFN の場合は現時点ではまだブループリントが無いので少し特殊な方法でテキストを設定します。

Widget Blueprint に対して直接何かするというよりかは、HUD Message Device 経由でテキストを設定する感じで、少し手順が複雑なので忘れないうちにこの記事にまとめておきます。
手順
では早速、手順を見ていきましょう。
Widget Blueprint の作成
まだ Widget Blueprint を作成していない場合は以下の手順で作成しましょう。
手順1
コンテンツドロワーの中で右クリックして「User Interface > Widget Blueprint」を選択します。

手順2
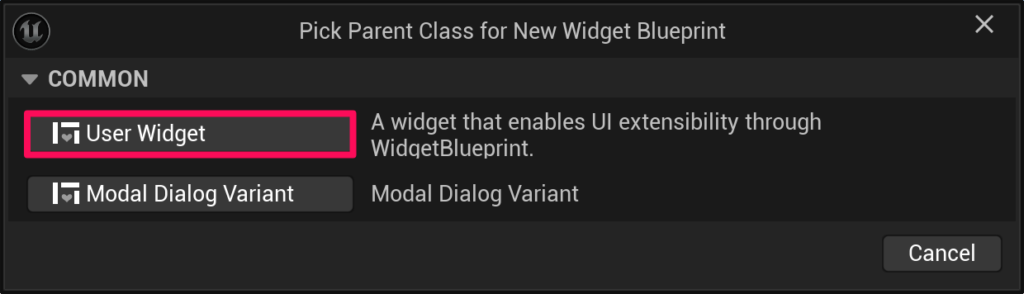
親クラスを選択する画面が表示されるので「User Widget」を選択します。
コンテンツドロワーの中に Widget Blueprint が作成されるのでファイル名も設定しておきます。
手順3
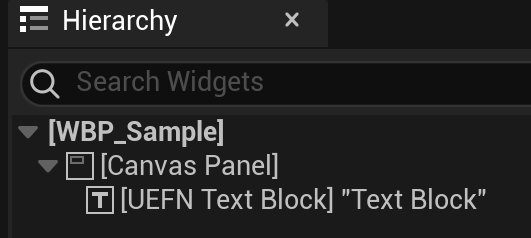
ヒエラルキーのルートに Canvas Panel を設置して、その直下などに UEFN Text Block を追加します。
バインディング
ここからはバインディングを行います。
手順4
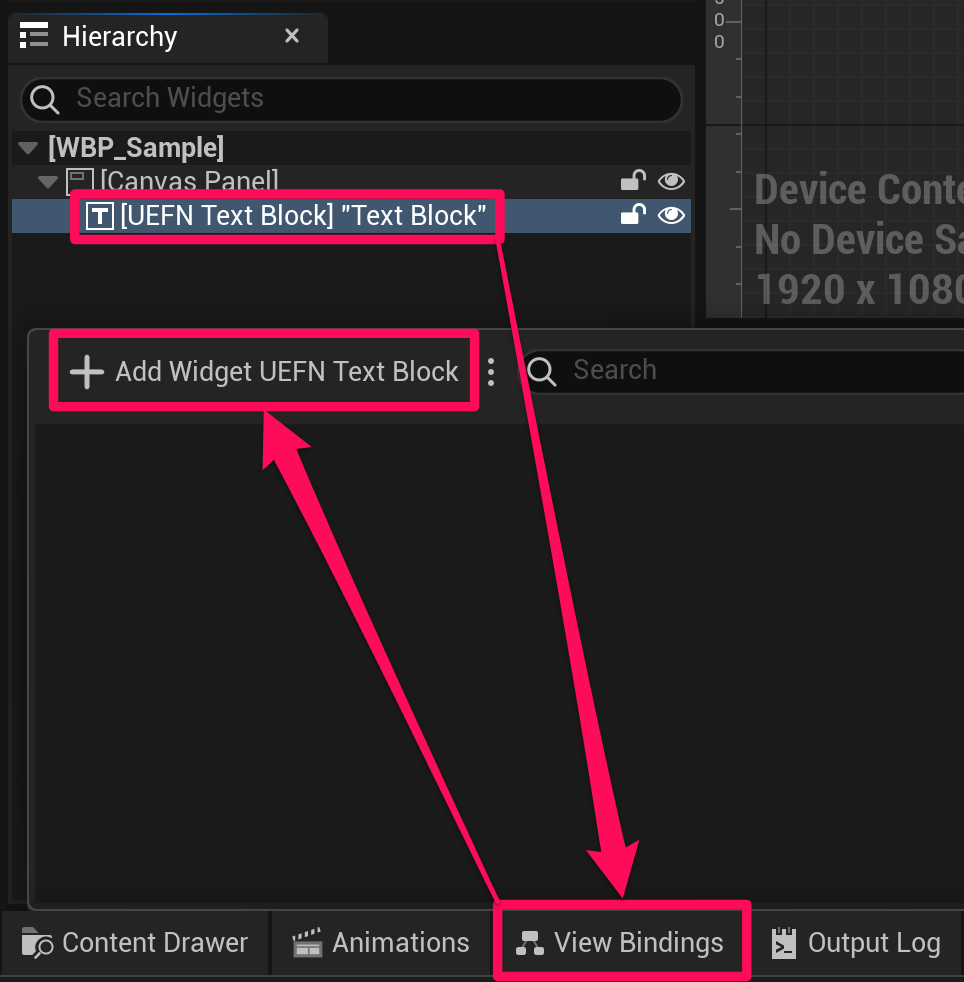
まずは下の「View Bindings」から「Add Viewmodel」を押します。

手順5
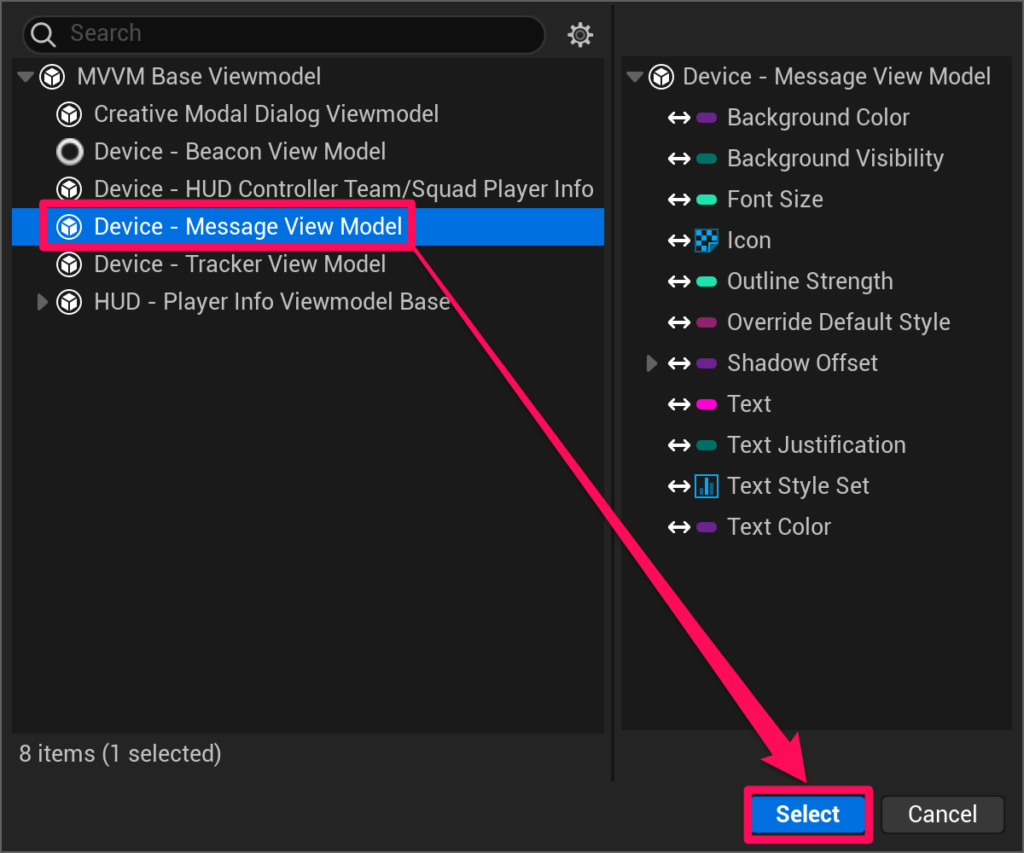
「Device – Message View Model」を選択して右下の「Select」を押します。
手順6
ヒエラルキーの中の UEFN Text Block を選択している状態で、下の「View Bindings」から「+ Add Widget {ウィジェット名}」を押します。
手順7
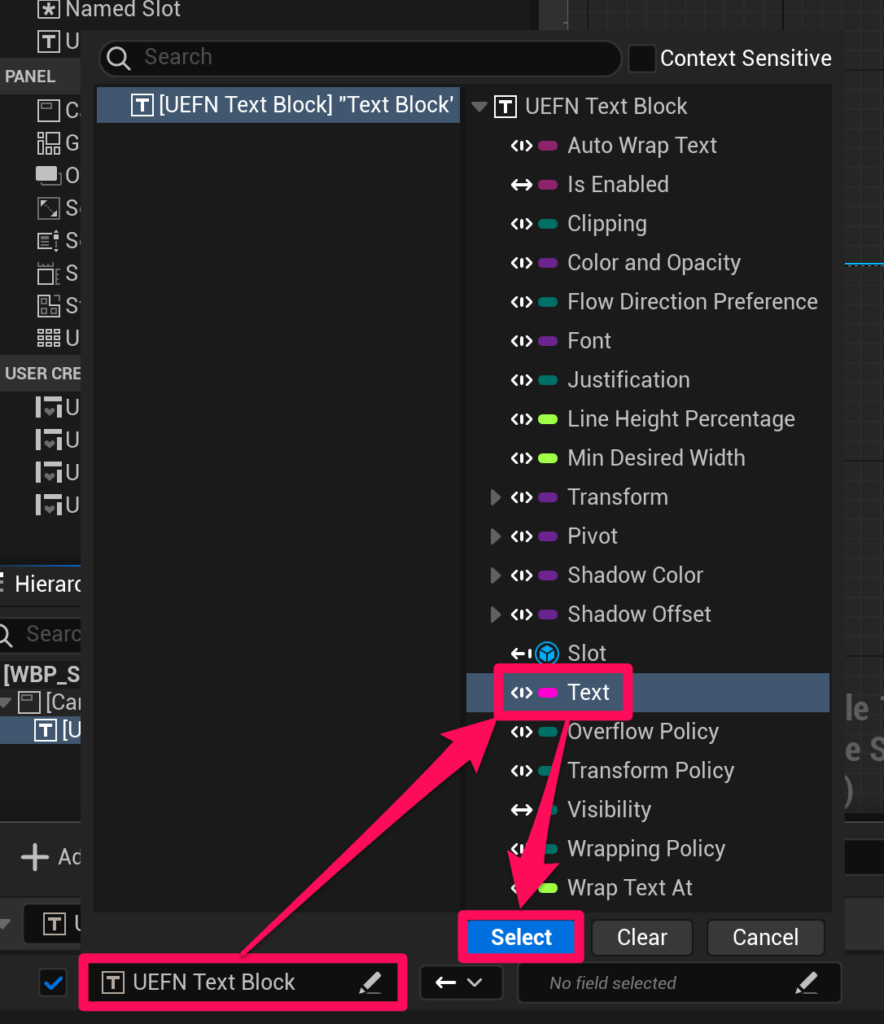
チェックボックスの右側のウィジェット名のボタン(下の画像の例だと「UEFN Text Block」って書いてあるやつ)を押して「Text」を選択し、下の「Select」を押します。
手順8
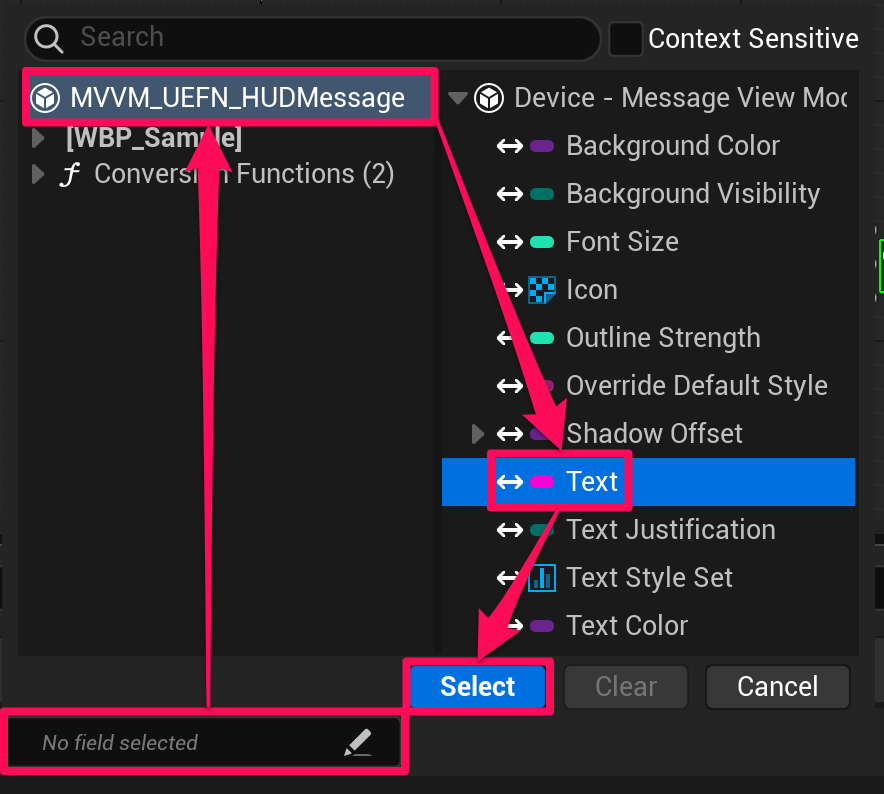
「No field selected」となっている部分を押して「MVVM_UEFN_HUDMessage > Text」を選択し、下の「Select」を押します。
手順9
これでバインディングは完了したので左上の「Compile」を押してから、その左の保存ボタンも押して変更を保存しましょう。

HUD Message Device の設置と設定
ここからは HUD Message Device をレベル上に設置します。
手順10
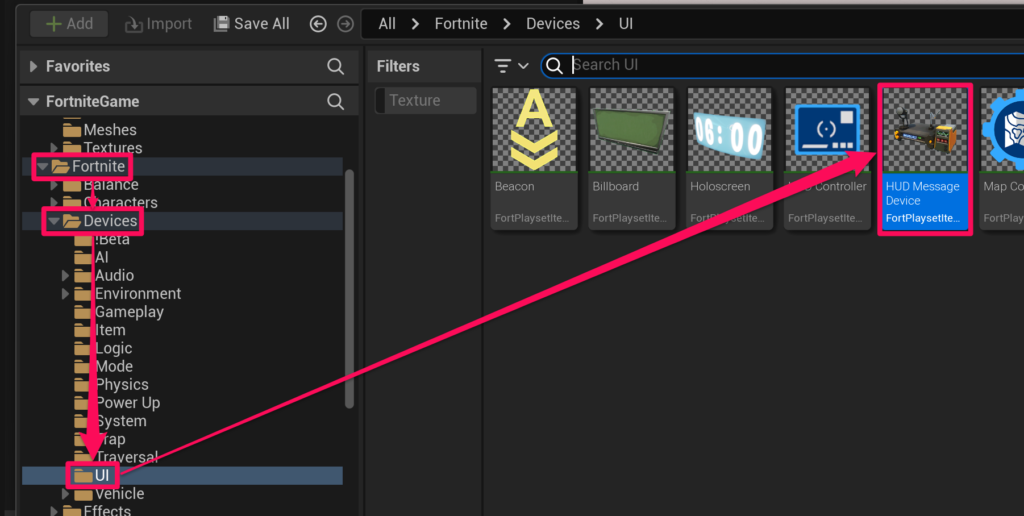
コンテンツドロワーを開いて、「Fortnite > Devices > UI」にある HUD Message Device をレベル上にドラッグ & ドロップします。
手順11
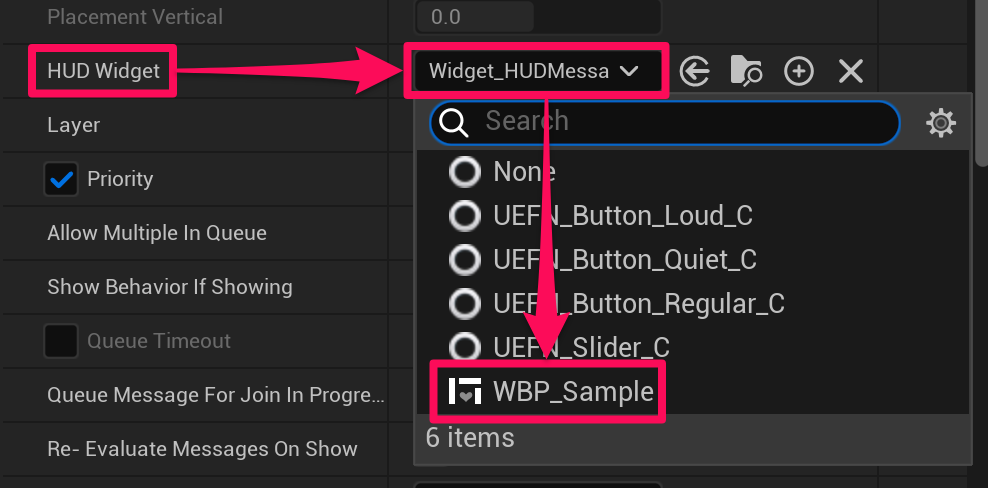
ドラッグ & ドロップした HUD Message Device を選択して「Details > User Options > HUD Widget」に先ほど作成した Widget Blueprint をアサインします。
手順12
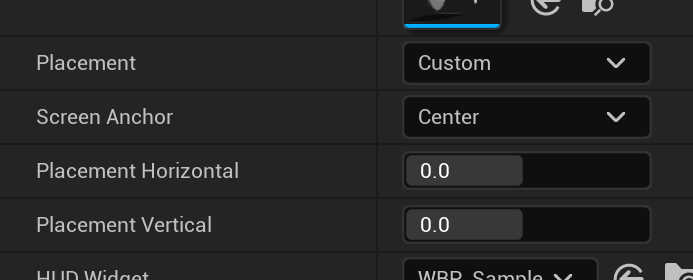
必要に応じて HUD Message Device の Placement や Screen Anchor などのアンカーに関する設定も行いましょう。
Verse での処理の作成
ここからは早速、Verse を書いていきます!
手順13
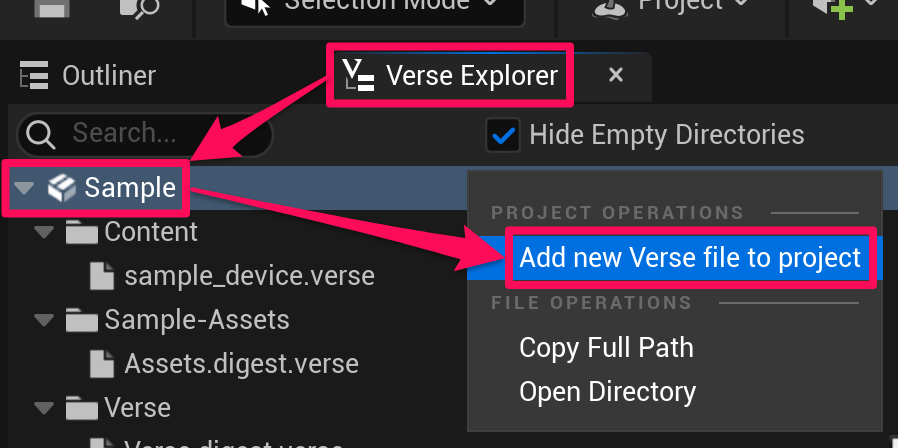
Verse Explorer のプロジェクト名を右クリックして「Add new Verse file to project」を選択します。
手順14
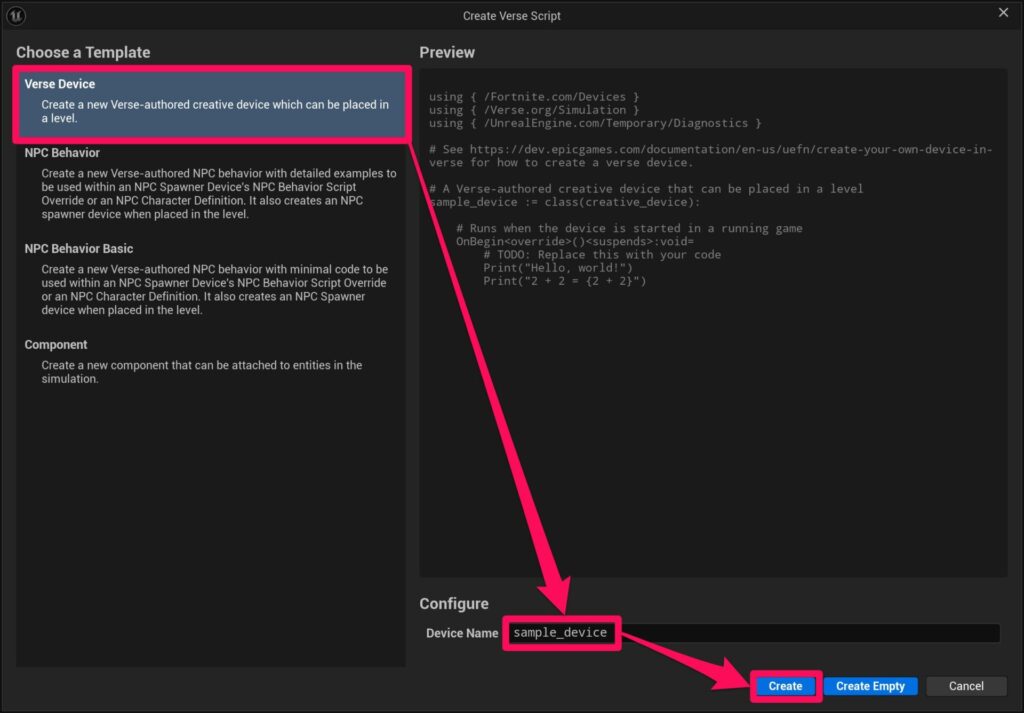
左上で「Verse Device」を選択して Device Name を設定し、下の「Create」を押します。
手順15
このコードのような、hud_message_device にテキストを設定して表示する処理を記述して保存します。
using { /Fortnite.com/Devices }
using { /Verse.org/Simulation }

sample_device := class(creative_device):

    @editable
    HudMessageDevice:hud_message_device= hud_message_device{}

    OnBegin<override>()<suspends>:void =
        HudMessageDevice.Show(StringToMessage("Hello World"))

    StringToMessage<localizes>(StringValue:string):message = "{StringValue}"
手順16
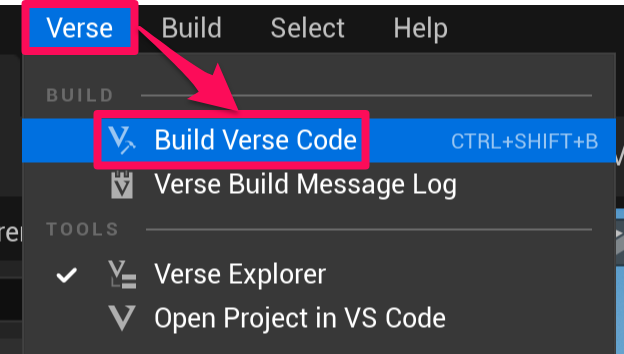
UEFN に戻り、「Verse > Build Verse Code」を押してコードをビルドします。
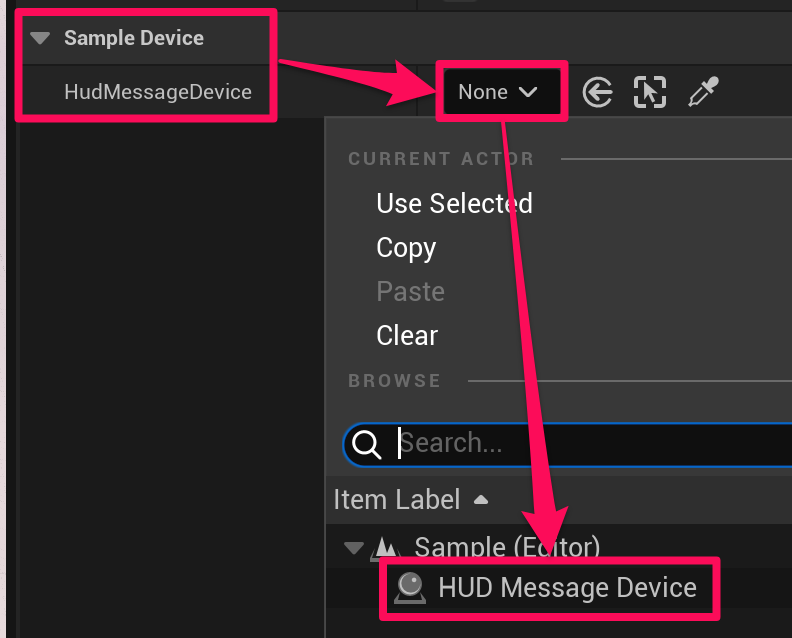
手順17
コンテンツドロワーの中に出現した Verse 製のデバイスをレベル上にドラッグ & ドロップして、@editable を付けたメンバ変数にレベル上の HUD Message Device をアサインします。
デバッグ
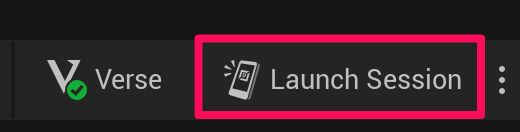
手順18
上の「Launch Session」か「Push Changes」を押して Fortnite に切り替えます。
手順19
ゲームをスタートすると Verse で設定したテキストが表示されるはずです!