はじめに
UEFN でワールド内の画像を常にプレイヤーの方向に向けるにはどうすればいいでしょうか?
こちらの動画で紹介されているように creative_prop を一定時間ごとにプレイヤーの方向に回転させることでも実現できますが、立体のメッシュではなく、1枚のペラペラな画像を常にプレイヤーの方向に向ける場合は Verse を使わなくても実現できます。
(いや、画像でもメッシュでも Niagara で実現できるかもしれない…)
これから紹介する方法を記事にまとめるにあたって参考にさせていただいた動画を先に貼っておきます。
(上の動画と同じく Graeme Bull 様の動画です!とても分かりやすいのでオススメのチャンネルです!)
手順
ここからは早速、手順を解説します。
マテリアルの作成
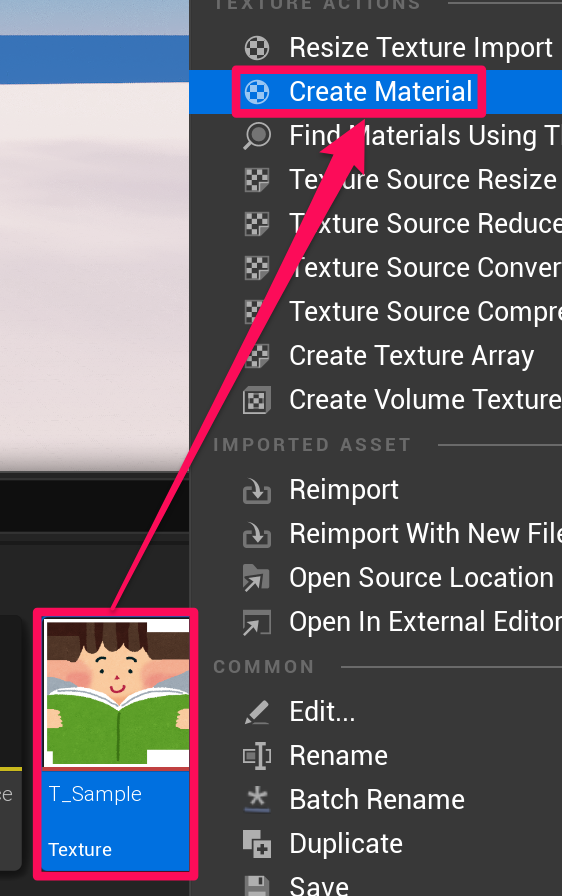
手順1
まず、透過画像などのテクスチャを UEFN にインポートして、そのテクスチャ上で右クリックし、「Create Material」を選択します。
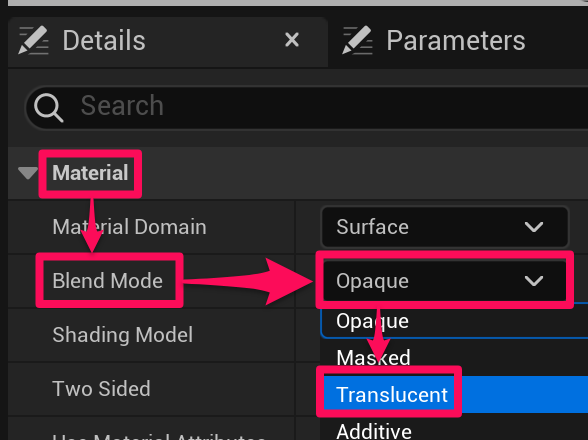
手順2
そのテクスチャがグラフに置かれた状態のマテリアルが作成されるので、マテリアルの名前を設定し、作成したマテリアルをダブルクリックして開きます。
透過するマテリアルにしたい場合は「Details > Material > Blend Mode」を Translucent に変更しましょう。
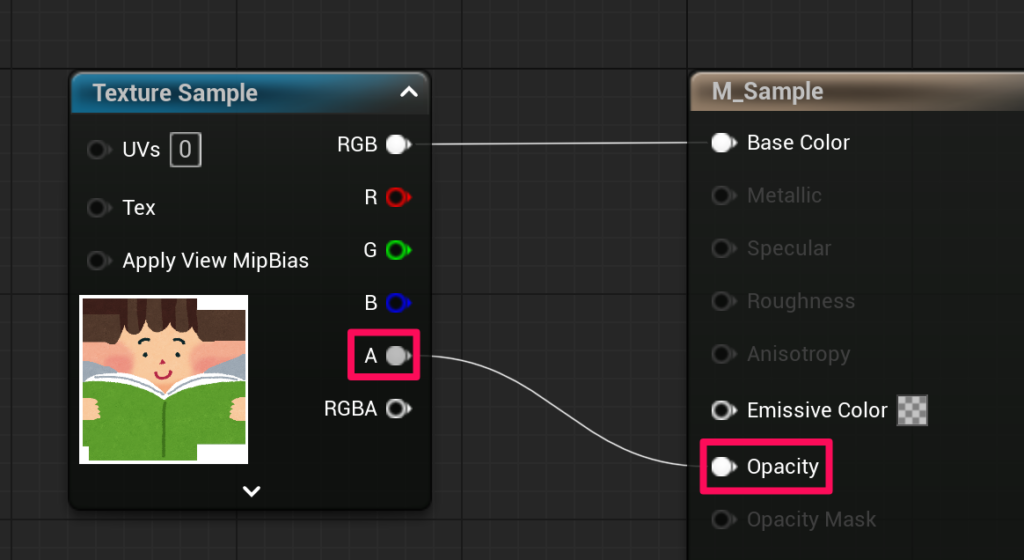
手順3
テクスチャの透過部分を透明にしたい場合は Texture Sample の「A」を Opacity に接続しましょう。
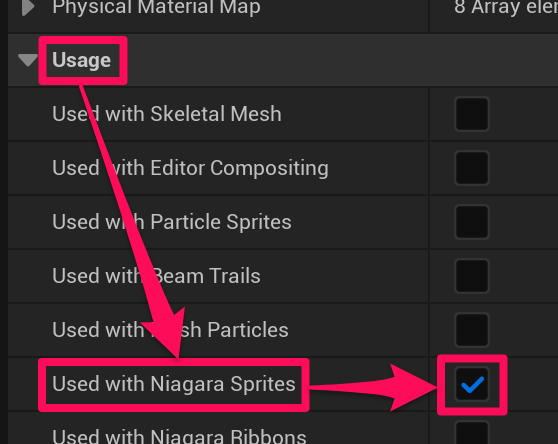
手順4
このマテリアルは Niagara というエフェクト作成ツールで使用するので、「Details > Usage > Used with Niagara Sprites」にチェックを入れておきます。
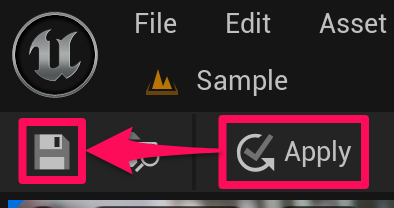
手順5
左上の「Apply」を押して変更を適用します。
適用できたら、その左の保存ボタンを押して保存しましょう。
Niagara System の作成
ここからは Niagara System というものを作成します。
Niagara とは簡単にいうとエフェクト作成ツールのことで、Niagara System とは Niagara でのエフェクト作成の基盤となるものです!
(詳しくは当ブログのこちらの記事を見ていただけると良いかと思います!)
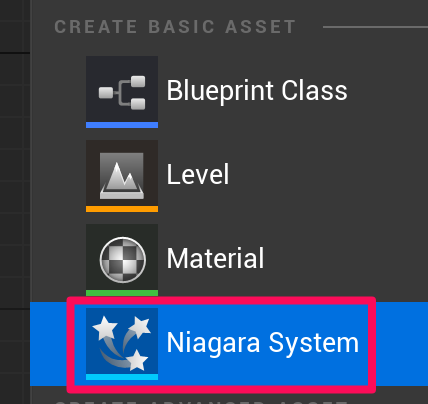
手順6
まずはコンテンツドロワーを開いて、その中で右クリックし、「Niagara System」を選択します。
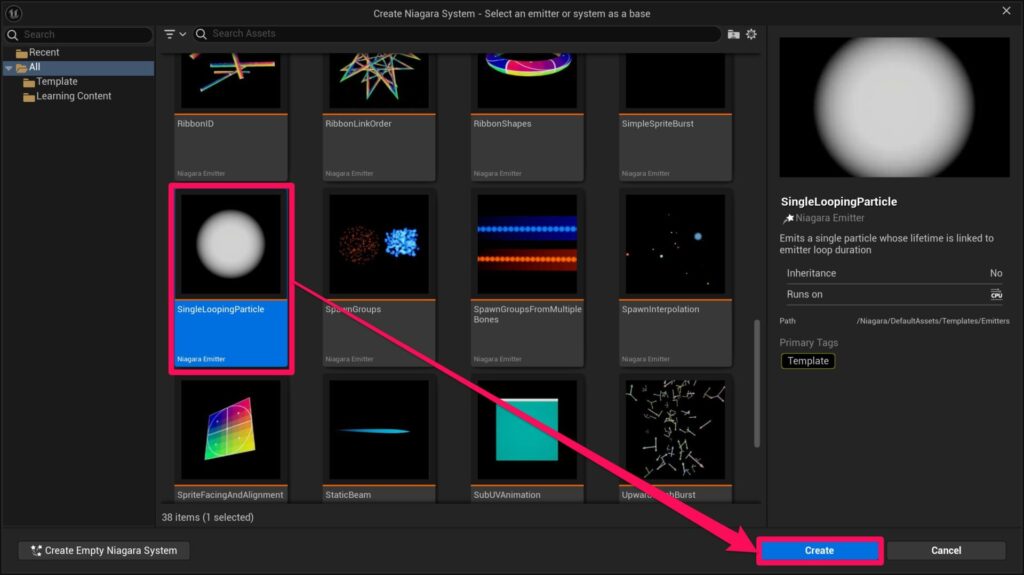
手順7
「SingleLoopingParticle」を選択して右下の「Create」を押します。
手順8
SingleLoopingParticle ノードをクリックして「Details > Render > Sprite Renderer > Material」に先ほど作成したマテリアルを設定して保存します。

Niagara System の作成はこれで終わりです!
作成した Niagara System の設置
早速、Niagara System を設置していきます!
Niagara System の設置はとてもシンプルです!
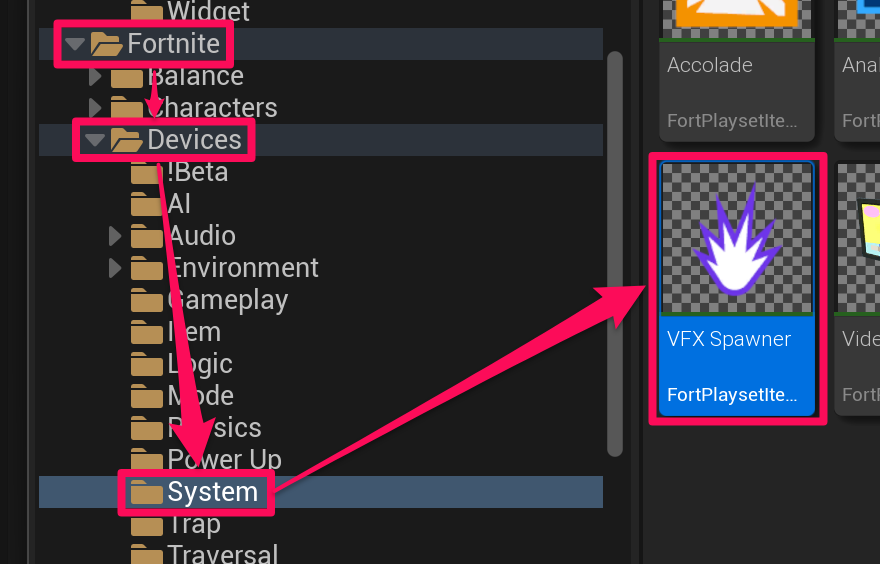
手順9
コンテンツドロワーを開いて「Fortnite > Devices > System」にある VFX Spawner をレベル上にドラッグ & ドロップします。
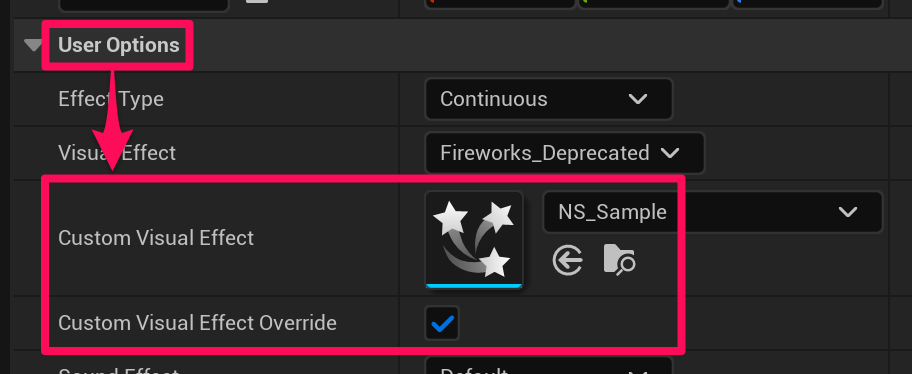
手順10
ドラッグ & ドロップした VFX Spawner を選択して User Options 内の「Custom Visual Effect Override」にチェックを入れて、先ほど作成した Niagara System を Custom Visual Effect にアサインします。
デバッグ
変更を保存したら早速プレイしてみましょう!
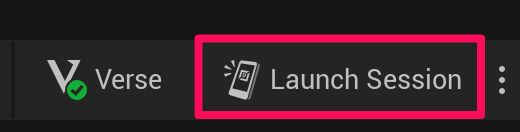
手順11
上の「Launch Session」か「Push Changes」を押して Fortnite に切り替えます。
手順12
Fortnite でゲームを開始後、プレイヤーが動いても画像が常にプレイヤーの方向を向き続けるはずです!