はじめに
Unreal Engine で反射表現を実現するにはいろいろな方法がありますが、事前に周囲の環境をキャプチャしてゲーム実行中はその事前にキャプチャした反射情報を写すだけという軽い実装にしたいときは Reflection Capture を使用するのが一般的かと思います。
しかし、Reflection Capture を使用すると StaticMeshActor ごとに Reflection Capture の反射情報を設定するのではなくて Reflection Capture の範囲内にある全ての StaticMeshActor にその反射情報が適用されることになります。
今回はどうしても StaticMeshActor ごとに個別で反射情報を設定したかったのでその方法を紹介します。
手順
反射情報の作成
手順1
では早速手順を解説します。
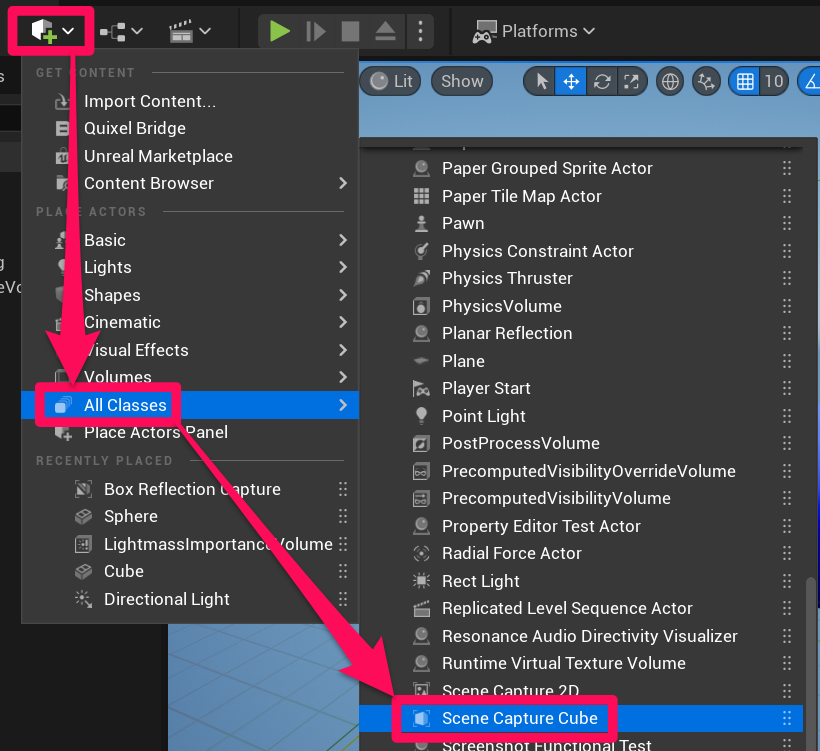
まずはレベルエディタの左上の「+」から「All Classes > Scene Capture Cube」を選択してレベル上に Scene Capture Cube を追加して適切な場所に設置します。
カメラの見た目をしたアクタがレベル上に追加されると思います。
このアクタ自体はゲーム実行中に見えませんが、このアクタを使って周囲の環境をキャプチャします。
手順2
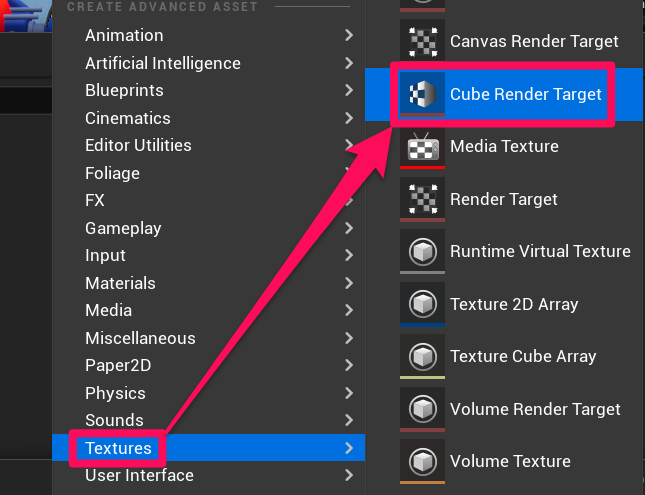
コンテンツドロワーの中で右クリックして「Textures > Cube Render Target」を選択して Cube Render Target を作成します。
周囲の環境はこの Cube Render Target というテクスチャに焼き付けます。
手順3
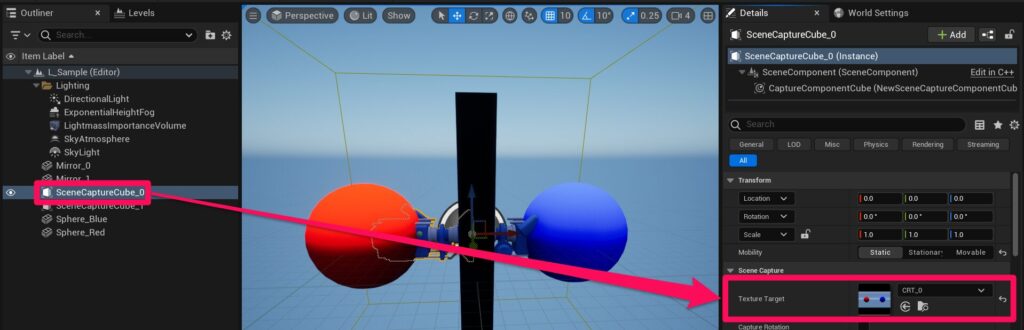
「手順1」で作成した Scene Capture Cube をアウトライナーで選択します。
先ほど作成した Cube Render Target を「Details > Scene Capture > Texture Target」にアサインします。
Scene Capture Cube を特に何もいじっていない状態だとこれだけで Cube Render Target に周囲の環境が焼き付いてくれてるはずです。
マテリアルへの適用
手順4
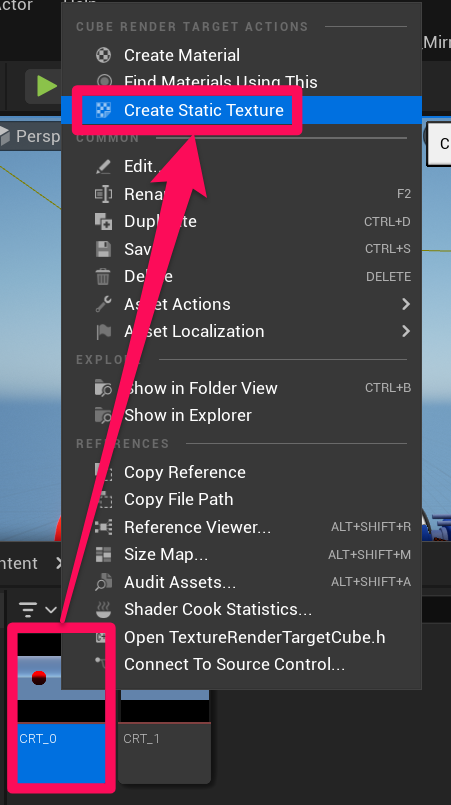
「手順2」で作成した Cube Render Target で右クリックして「Create Static Texture」を選択し、その Cube Render Target を基にしたテクスチャを作成します。
手順5
この反射情報を設定したい StaticMeshActor 用のマテリアルを開きます。
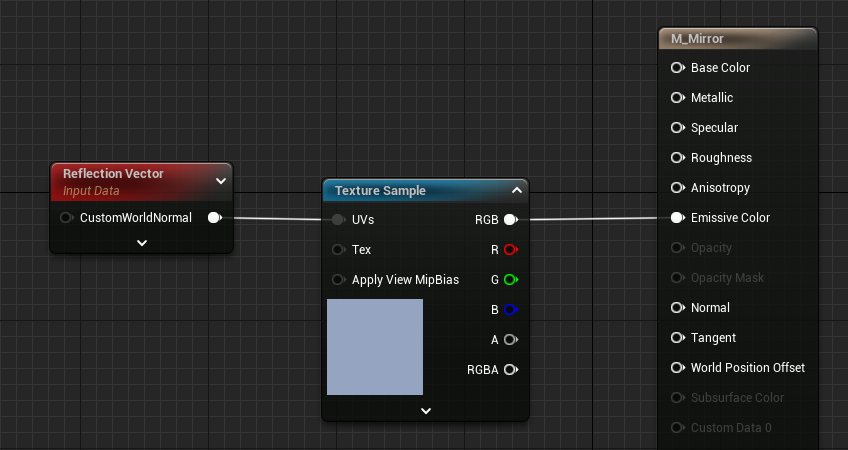
「Reflection Vector」と「Texture Sample」を追加して先ほど作成したテクスチャを Texture Sample にアサインします。
その Texture Sample の RGB を Emissive Color に接続します。
手順6
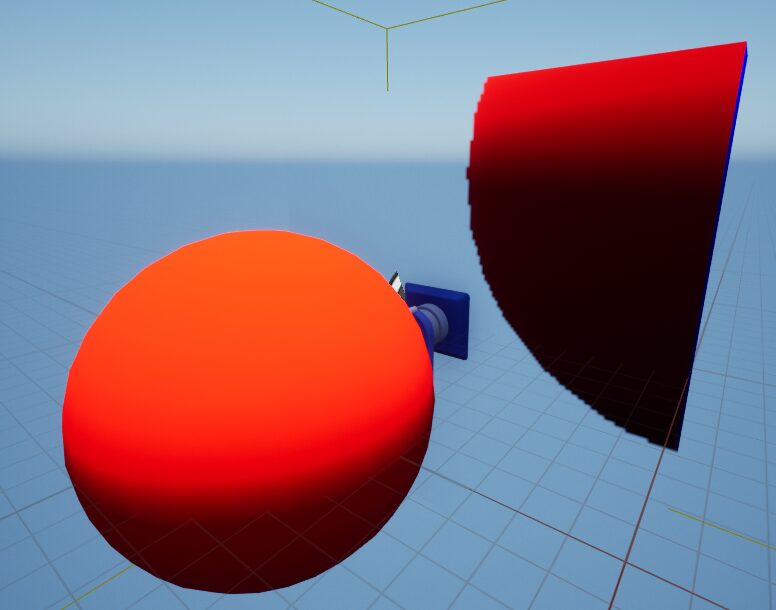
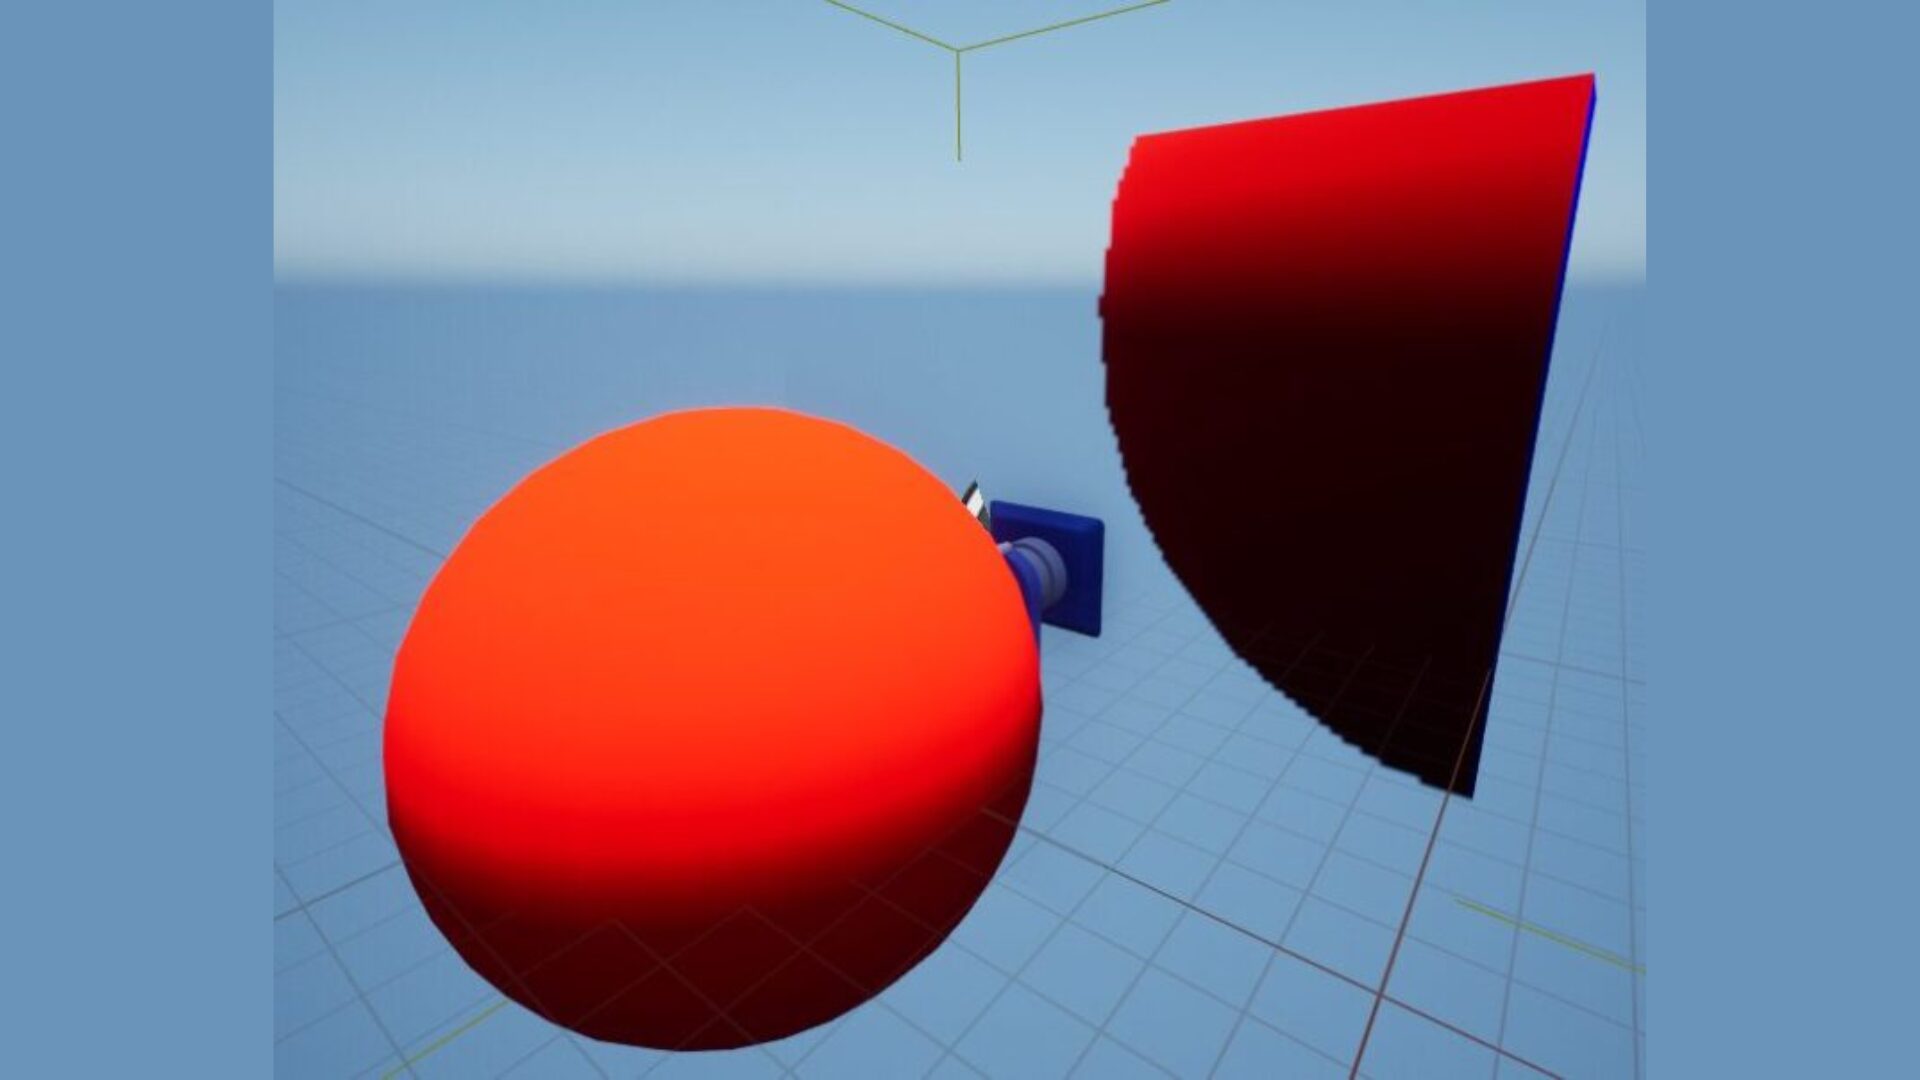
そのマテリアルがアサインされている Static Mesh Actor にその反射情報がしっかり反映されているか確認します。
この画像では赤い球体の正面の板にそのマテリアルを適用しています。
反射している赤い球体の大きさが少しおかしいように見えますが、一応は反射しているように見えます。